

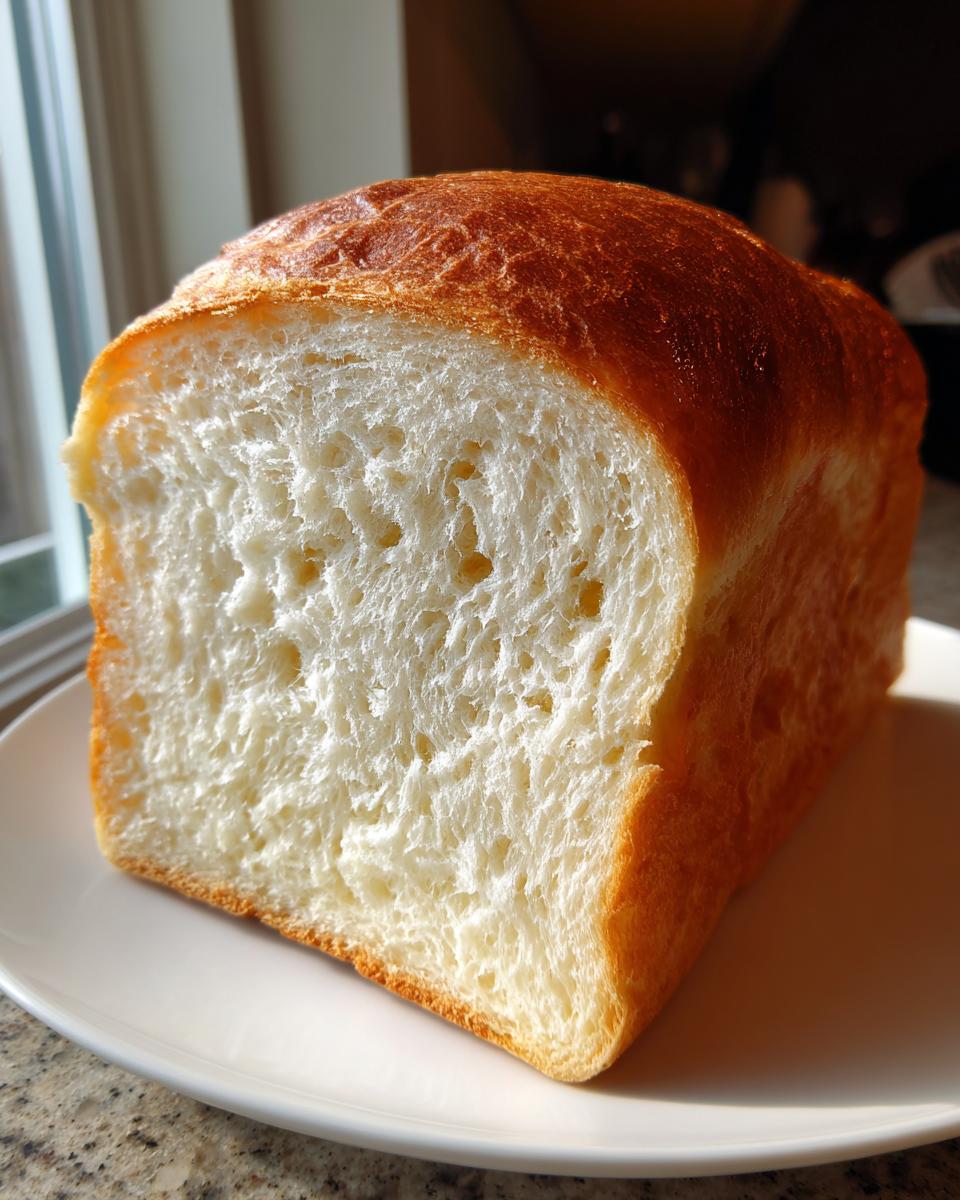
Oh, friends, there is absolutely nothing in the world that compares to the smell of freshly baked **bread** filling your home. It’s instantly comforting, isn’t it? It reminds you that something wonderful is coming out of the oven soon. For years, people felt intimidated by making yeast bread from scratch, but I want to change that for you right now! This recipe, the Easiest Homemade Fluffy White Bread Recipe, is truly for anyone who has ever just wanted a reliable, soft loaf without a huge fuss.
Here at HearthBite, we believe that food is about connection, and that feeling of pulling a perfect, springy loaf for your family is priceless. This simple white bread is wonderfully beginner-friendly because it relies on basic pantry ingredients and gives you those gorgeous, fluffy results every single time. Trust me, once you master this simple loaf, you’ll feel like you can conquer anything in the kitchen. It’s the perfect foundation for all your future baking adventures!
It’s the kind of reliable baking that makes you feel cozy and connected to home, just like my grandmother showed me. If you’re looking for more recipes that hug your soul, you should absolutely check out our collection of comfort food recipes.
- Why This Is the Easiest Homemade Bread Recipe for Beginners
- Gathering Ingredients for Your Fluffy White Bread
- Step-by-Step Instructions for Baking Your Homemade Bread
- Tips for Achieving the Perfect Soft Sandwich Bread Texture
- Storing Your Homemade Bread Loaf
- Troubleshooting Common Issues with Your First Bread Attempt
- Frequently Asked Questions About Making Bread From Scratch
- Nutritional Estimates for This Simple Loaf Recipe
- Share Your Baking Journey with HearthBite Bread
Why This Is the Easiest Homemade Bread Recipe for Beginners
Listen, I know the word “yeast” can scare people off homemade **bread**, but don’t let it! This specific recipe is famous because it sets you up for success right from the very first step. We made sure the ingredient ratios are forgiving, which is exactly what you need when you’re starting out. We aren’t asking you to handle complicated sticky doughs or perform tricky shaping.
This recipe is designed to create that beautifully soft, fluffy bread texture everyone dreams about—it’s practically foolproof. Honestly, so many people have found confidence with this loaf that it has become one of our most trusted recipes here at HearthBite. It’s the perfect entry point to mastering your own white bread from scratch. If you nail this, you’ll feel ready to tackle anything! For mornings when you want something guaranteed quick, take a peek at my easy breakfast recipes collection.
Gathering Ingredients for Your Fluffy White Bread
Okay, before we get messy, let’s talk about what you need to pick up! Baking homemade **bread** doesn’t require fancy specialty store trips, which is another reason I love this recipe so much. We are sticking to simple, everyday pantry items. Having the right measurements here is key because baking is truly a science! You’ll want to measure everything out now so you can move smoothly once we get to the mixing stages.
Here is exactly what you need:
- 1 cup warm water (105-115°F)
- 2 1/4 teaspoons active dry yeast
- 1 tablespoon granulated sugar
- 2 1/2 tablespoons unsalted butter, melted
- 1 1/2 teaspoons salt
- 3 1/2 cups all-purpose flour
Ingredient Notes and Substitutions for Perfect Bread
A quick word on these exact measurements, especially regarding the yeast! That warm water temperature is really important; too hot and you kill your yeast buddy before it even starts working. You need that water to be between 105 and 115 degrees Fahrenheit—just warm, not hot. If it’s not foamy after ten minutes, then your yeast is dead, and we have to start that step over!
We call for all-purpose flour here because it keeps things easy for beginners. However, if you happen to have bread flour on hand, you can certainly swap it out. Bread flour has higher protein, which develops slightly stronger gluten, giving you a chewier loaf. But honestly, stick with the AP flour for your first try; this recipe is brilliant either way.
Step-by-Step Instructions for Baking Your Homemade Bread
Alright, let’s get our hands dusted! Baking fantastic homemade **bread** is just a series of simple actions stacked on top of each other. Following these steps exactly will give you that beautiful, soft loaf we’re aiming for. Remember, patience during the rising times is just as important as the mixing itself. When you’re deep into a baking project like this, sometimes you just need a great meal idea for later, so keep my list of quick, easy dinner recipes bookmarked!
Activating Yeast and Mixing the Bread Dough
First things first: we need to wake up that yeast. In your big bowl, pour in your warm water, sugar, and yeast. Give it a gentle stir—don’t go crazy! Then, you just wait. We are looking for serious foam on top, like a little bubbly cap. If you see that foam coming up after about ten minutes, your yeast is active and ready to go to work!
Once it’s bubbly, pour in that melted butter and salt. Then, dump in the first two cups of flour and mix it up with a sturdy spoon until it’s just incorporated. Don’t worry if it looks messy; we’re just getting things acquainted. Finally, add that last bit of flour slowly until you stop needing a spoon and can manage a shaggy mass.
Kneading and First Rise for Fluffy Bread
Time to get messy! Turn that sticky dough out onto a lightly floured counter. Now, we knead. You have to work it for about six to eight minutes. In the beginning, it’s going to feel sticky and kind of lumpy, but keep at it! I always tell people to focus on the texture change—you’ll know it’s ready when the dough feels smooth, supple, and no longer sticks stubbornly to your hands. That’s the gluten developing beautifully!
Lightly oil a clean bowl—just a tiny slick of oil works wonders—and pop your perfectly kneaded dough in there, making sure to turn it over so it’s coated all around. Cover it with plastic wrap or a kitchen towel. Now, find a nice, warm spot in your kitchen, maybe near the stove, and let it sit for an hour to an hour and a half. We are waiting for it to double in size!
Shaping, Second Rise, and Baking the Final Bread
Once your dough has doubled up, you need to gently punch it down. Don’t be aggressive; we just want to release those big air pockets. Gently deflate it and shape it into a log. Tuck the ends under neatly and place it snugly into your greased 9×5 loaf pan. It should nestle in nicely now.
Cover that pan loosely, and let it rest again in that warm spot for about 30 to 45 minutes. This second rise is super important for a high, evenly baked loaf of **bread**. You have to keep an eye on it: it’s done rising when it crests about one inch above the rim of the pan. About 20 minutes before that rise finishes, go ahead and get your oven heated up to 375°F. Pop it in and bake for 30 to 35 minutes until it’s beautiful and golden brown!
Tips for Achieving the Perfect Soft Sandwich Bread Texture
We’ve baked this lovely loaf of **bread**, but how we treat it right after it comes out of the oven determines how soft that sandwich bread ends up being! This is where a lot of home bakers rush things, and honestly, it’s a shame after all that hard work.
Remember that tip I mentioned in the notes? As soon as that pan comes out of the oven (and I mean *immediately*), brush the top crust with just a tiny bit of melted butter. It sounds simple, but that fat soaks in just enough to keep the crust tender and shiny, rather than letting it dry out and harden into something tough.
The second crucial step is cooling. Don’t just leave that loaf sitting in the hot pan on the counter for 15 minutes—that traps steam underneath and guarantees a soggy bottom! Turn the bread out onto a wire cooling rack right away. This allows air to circulate all around the loaf, setting the structure perfectly so you get a light, fluffy consistency all the way through. If you’re looking for ways to use that perfect loaf later in the day, check out some of my healthy lunch recipes!
Storing Your Homemade Bread Loaf
Now for the hardest part of baking homemade **Yeast Bread**: waiting for it to cool! Seriously though, storing it correctly is key to keeping that gorgeous, soft texture for days. Since this loaf doesn’t have any preservatives, it’s best eaten within two or three days of baking for peak freshness.
You absolutely must let it cool completely on that wire rack first. If you try to wrap it while it’s still warm, the trapped steam will just make the inside gummy, and we worked too hard for gummy bread!
Once it’s totally cool, wrap it tightly in plastic wrap, and then maybe tuck that into a bread box or a large zip-top bag. If you know you won’t finish it right away, this loaf freezes like a dream! Just slice it first, wrap the slices well, and you can pull out what you need whenever you want a slice of fresh-tasting bread later. These make great additions to things like my moist date nut bread for a little variety!
Troubleshooting Common Issues with Your First Bread Attempt
Don’t panic if your first attempt at baking **bread** doesn’t come out looking like the cover of a magazine! Every single seasoned baker I know has a story about a dough that refused to rise or a loaf that came out heavy as a brick. That’s okay! It usually just means we need to adjust one little measurement or check the temperature. Baking with yeast demands a bit of forensic work sometimes, but we can get this sorted out.
If your dough just won’t move after that first hour, it’s almost always a temperature situation. Yeast is super sensitive! If your kitchen is chilly—say, below 70°F—that yeast stays sluggish. Remember my trick? Turn your oven light on, but don’t turn the actual oven on! Place that covered bowl inside for an hour. That gentle, residual heat creates a lovely little tropical environment for your dough to thrive.
Now, what if you followed everything, got a beautiful rise, but after baking, your loaf is surprisingly dense? Nine times out of ten, that means we over-kneaded or, more likely, under-proofed. If you punch the dough down too aggressively, you knock out all those beautiful air bubbles we worked so hard to create. Be gentle when you deflate it after the first rise!
Another common issue is inaccurate measuring of flour. It’s so easy to scoop flour right out of the bag, but that packs it down tightly, and you end up adding way more than the recipe intends. This results in a dry, dense cake instead of soft bread. Try scooping the flour lightly into your measuring cup and then leveling it off with a knife. If you want more confidence in your process later on, you might enjoy looking at some of my tips for sourdough discard rolls—they teach great dough handling!
Remember, every loaf that doesn’t come out perfectly is just one step closer to the next one being spectacular. Learning how your ingredients react in your specific kitchen is half the fun!
Frequently Asked Questions About Making Bread From Scratch
It’s my absolute favorite part when folks start **beginner bread baking** and have questions! It means you’re in the kitchen trying this recipe, and that fills my heart up. When you’re making **white bread from scratch** for the first time, it’s natural to have a few uncertainties. Here are the things I get asked about the most:
Can I use instant yeast instead of active dry yeast in this bread recipe?
Great question! Yes, you certainly can substitute instant yeast for active dry yeast. If you use instant yeast, you can technically skip that first five to ten-minute proofing step where you check if it foams. Just mix the instant yeast right in with your dry ingredients (flour, salt, and sugar) before adding the wet ingredients. It’s a little shortcut we use sometimes!
What is the best way to get a truly soft crust on my homemade bread?
This tip directly impacts how lovely your sandwich bread feels! The key is time and butter. As soon as that loaf slides out of the hot pan onto the cooling rack, grab a pastry brush and melt about a tablespoon of butter. Brush it all over the top crust quickly. Then, here’s a pro move: let it cool for just five minutes on the rack, and then loosely drape a clean kitchen towel over it for the next 20 minutes. It traps just enough gentle steam to keep that crust cozy and soft!
How long does it take to bake a simple loaf recipe like this?
When people ask how long it takes, I always have to break it down because of the rising! The actual active time—when you’re mixing, kneading, and shaping—is only about 30 minutes total. However, the whole process, including both rises, takes nearly two hours. Don’t rush those rises, though! That passive time is where the magic happens in creating that fluffy texture. If you’re looking for some fast ideas for your next meal, check out my easy breakfast recipes while you wait for the dough to double!
Nutritional Estimates for This Simple Loaf Recipe
When we’re talking about making something delicious at home, like this wonderful loaf, I always want to be transparent about what goes into it. Because we are using simple, real ingredients, you already have a leg up on what you find in some store-bought options! But since I don’t run a commercial kitchen, I have to stress that these numbers are just estimates based on standard ingredient breakdowns. They are here to give you a good idea, not for specific medical tracking, okay?
This data reflects a serving size of just one slice of the finished **bread**. It’s amazing how much flavor we get out of just a few simple ingredients!
- Calories: Around 140 per slice
- Fat: About 3 grams
- Carbohydrates: Roughly 26 grams
- Protein: A solid 4 grams
- Sugar: A low 2 grams
- Sodium: Approximately 280 milligrams
See? It really is simple food, made with love! Knowing what’s in the loaf helps you feel confident serving it up for sandwiches or toast. We keep the sugar low because the sweetness comes mostly from the wheat itself and just a touch of added sugar to feed that yeast.
Share Your Baking Journey with HearthBite Bread
Now that you have mastered turning simple flour and water into your very own homemade, soft loaf, I really need all the details! That’s what HearthBite is all about—sharing the joy and connecting over the results. We’ve gone through the steps together, from waking up the yeast until you’re brushing that crust with butter.
Did this recipe give you that impossibly fluffy bread texture you were hoping for? Don’t keep your success a secret! I absolutely love seeing your creations pop up online. If you made this loaf, please come back here to the recipe card and leave a rating for me. Giving it those stars helps other home cooks who might be nervous about starting their **baking homemade bread** journey see that they can totally do this!
If you snapped a picture of your golden, perfect sandwich bread cooling on the rack, tag us! Sharing your success story—especially if you found a perfect warm spot for proofing—helps grow this wonderful community we are building around real food made from scratch. And if you need more reliable recipes that bring folks together around the table, spend some more time browsing the hearth right here at HearthBite.
If you want to see what inspired some of my methods for keeping things super easy, you can explore the original inspiration from some excellent online bakers, like this fantastic resource: Easiest Homemade Bread.
Happy baking, friends, and I can’t wait to hear how your amazing kitchen adventure turned out!
PrintEasiest Homemade Fluffy White Bread Recipe
You can bake this simple, soft white bread from scratch. This beginner-friendly recipe uses basic pantry ingredients to create a fluffy loaf perfect for sandwiches or toast.
- Prep Time: 20 min
- Cook Time: 35 min
- Total Time: 1 hour 55 min
- Yield: 1 loaf 1x
- Category: Baking
- Method: Baking
- Cuisine: American
- Diet: Vegetarian
Ingredients
- 1 cup warm water (105-115°F)
- 2 1/4 teaspoons active dry yeast
- 1 tablespoon granulated sugar
- 2 1/2 tablespoons unsalted butter, melted
- 1 1/2 teaspoons salt
- 3 1/2 cups all-purpose flour
Instructions
- In a large bowl, combine the warm water, yeast, and sugar. Let this mixture sit for 5 to 10 minutes until it becomes foamy. This proves your yeast is active.
- Add the melted butter, salt, and 2 cups of the flour to the yeast mixture. Mix with a wooden spoon until just combined.
- Gradually add the remaining 1 1/2 cups of flour, mixing until a shaggy dough forms.
- Turn the dough out onto a lightly floured surface. Knead for 6 to 8 minutes until the dough is smooth and elastic. You should feel the texture change from sticky to soft.
- Lightly grease a large bowl with oil. Place the dough in the bowl, turning it once to coat. Cover the bowl with plastic wrap or a clean kitchen towel.
- Let the dough rise in a warm place for 1 to 1 1/2 hours, or until it has doubled in size. This is your first rise.
- Gently punch down the risen dough to release the air. Shape the dough into a loaf and place it into a greased 9×5 inch loaf pan.
- Cover the loaf pan loosely and let the dough rise again for 30 to 45 minutes, or until it has crested about 1 inch over the rim of the pan. This is your second rise.
- Preheat your oven to 375°F (190°C) about 20 minutes before the end of the second rise.
- Bake for 30 to 35 minutes, or until the top is golden brown and the internal temperature reaches 200°F (93°C).
- Remove the bread from the pan immediately and place it on a wire rack to cool completely before slicing.
Notes
- For an extra soft crust, brush the top of the loaf with a small amount of melted butter immediately after removing it from the oven.
- If your kitchen is cold, place the dough in the oven while it is turned off, with the oven light on, to create a warm environment for rising.
- You can substitute bread flour for all-purpose flour for a slightly chewier texture.
Nutrition
- Serving Size: 1 slice
- Calories: 140
- Sugar: 2
- Sodium: 280
- Fat: 3
- Saturated Fat: 2
- Unsaturated Fat: 1
- Trans Fat: 0
- Carbohydrates: 26
- Fiber: 1
- Protein: 4
- Cholesterol: 6