
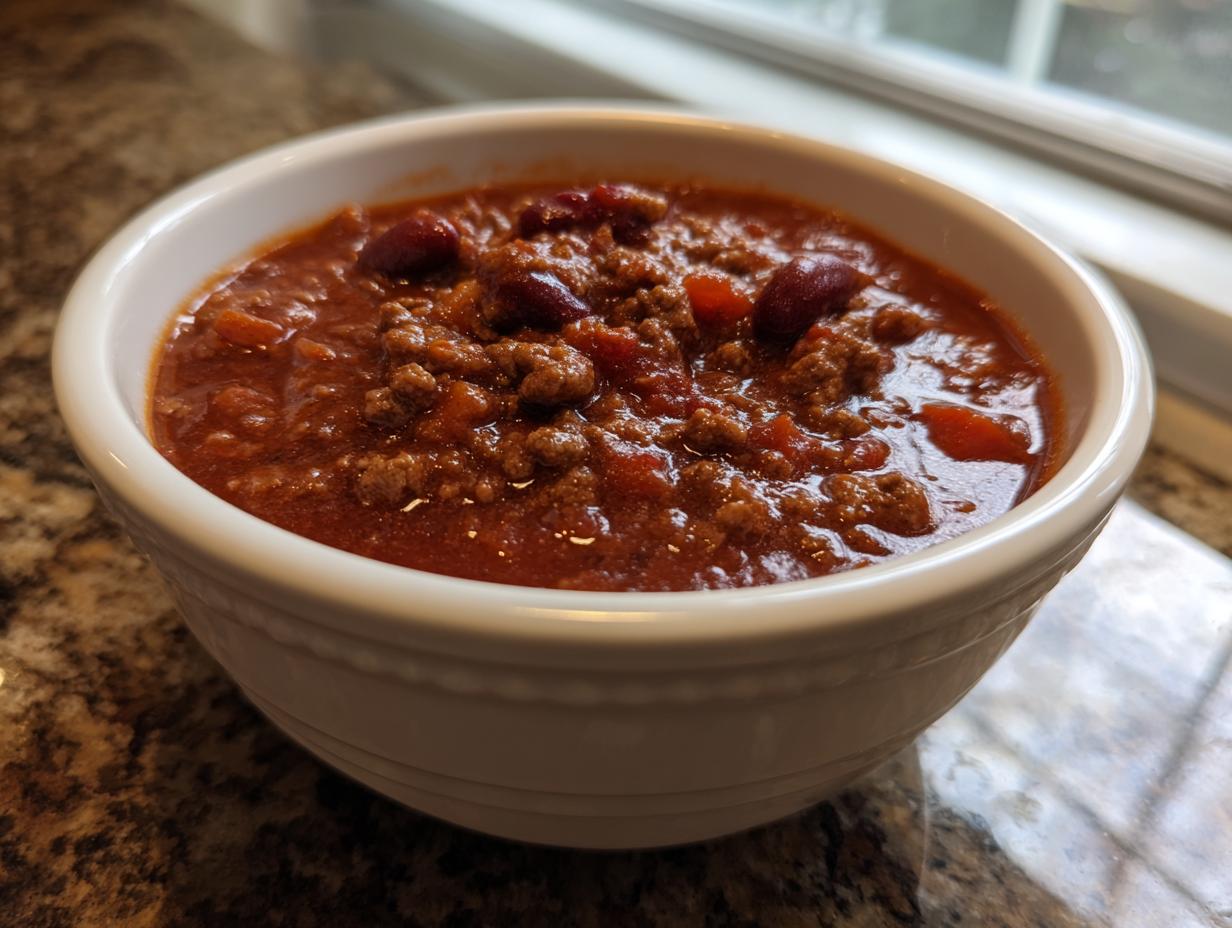
There is nothing quite like the feeling of coming home on a chilly evening, and knowing a steaming bowl of rich, hearty food is waiting for you. That’s exactly the promise of this Easy Stovetop Ground Beef Chili Ready in 30 Minutes. Around here at HearthBite, we believe the best meals are the ones that bring people together without keeping you chained to the stove, and this classic chili fits that philosophy perfectly.
It’s reliable, uses ingredients you probably already have, and delivers that deep, savory comfort food flavor we all crave. Forget complicated spice rubs or hours of simmering; this recipe is designed for your busy weeknights when you need something truly satisfying fast. It’s simple goodness, just like my mother taught me.
You’ll find this straightforward recipe is already one of our family favorites, and now, thanks to its simplicity, it’s going to be one of yours too. We’re kicking off our journey into savory spices right here, and trust me, you don’t need a complicated bank of comfort food recipes to get this right!
- Why This Easy Chili Recipe is Your New Weeknight Favorite
- Gathering Ingredients for Your Classic Chili Recipe
- Step-by-Step Instructions for Stovetop Ground Beef Chili
- Tips for the Most Flavorful Chili
- Serving Suggestions and Chili Toppings Ideas
- Make Ahead Chili and Storage Instructions
- Frequently Asked Questions About This Simple Chili Recipe
- Nutritional Snapshot of This Hearty Chili
- Share Your Experience Making This Chili
Why This Easy Chili Recipe is Your New Weeknight Favorite
I know you’re busy, and that’s why this recipe is designed to be your absolute go-to. When I developed this on a particularly hectic Tuesday, I realized how much we rely on those quick, reliable dishes that still feel like a real meal. This isn’t just food; it’s a true feeling of well-earned rest.
This recipe delivers on all the things a modern home cook needs. Take a look at why it’s going straight into your favorites binder. You can find more ideas like this in my collection of quick and easy dinner recipes!
Ready in Under 45 Minutes
Honestly, if dinner isn’t on the table relatively fast these days, I start getting impatient! The beauty here is that the active cooking time is about 15 minutes, and the whole thing is nestled in its pot and simmering within 30 minutes total. That means you get a rich, hearty comfort food served up before the baseball game even starts.
The Ultimate One Pot Chili Meals Experience
Let’s talk cleanup, because who wants to tackle half a sink full of dishes after a long day? This is the definition of one pot chili meals. Everything hits the Dutch oven, and once the simmering starts, you can focus on setting the table or helping with homework. You just wipe out one pot when you’re done! That alone is worth its weight in gold when making a batch of this great chili.
Gathering Ingredients for Your Classic Chili Recipe
Okay, now for the most important part: getting everything ready to go. Remember, because this recipe moves so fast—only about 30 minutes of cook time—you absolutely must have everything measured out and prepped before you even turn on the stove. This is called *mise en place* in fancy kitchens, but for us, it just means, “Don’t start frying the meat until the onion is chopped!”
You’ll need your beef, your veggies, your cans, and all those wonderful spices. Don’t worry; these are all simple ingredients, nothing too wild. If you’re looking up how to make creamy chicken tortilla soup, you’ve probably got most of this stuff already!
- 1 tablespoon olive oil (For getting that initial sizzle going!)
- 1 pound ground beef (I use 85/15—not too lean!)
- 1 medium onion, finely chopped
- 1 green bell pepper, equally chopped up
- 2 cloves garlic, minced super fine
- 1 (15 ounce) can kidney beans, rinsed and drained well
- 1 (15 ounce) can black beans, rinsed and drained well
- 1 (28 ounce) can crushed tomatoes
- 1 (15 ounce) can tomato sauce
- 1 cup beef broth (This is what keeps it from getting too thick too fast!)
- 2 tablespoons chili powder (This is our main flavor builder)
- 1 teaspoon ground cumin
- 1/2 teaspoon dried oregano
- 1/4 teaspoon cayenne pepper (Go ahead and skip this if you’re making it for non-spice lovers.)
- Salt and black pepper to taste
Ingredient Notes and Substitutions for Great Chili
Just a few quick notes so you get that perfect savory chili flavor. If you don’t have ground beef, please feel free to substitute ground turkey or even ground chicken, though the flavor won’t be quite as deeply beefy. You can also swap kidney beans for pinto beans if that’s what you usually keep stocked. Now, this recipe definitely includes beans, so if you’re after a proper Texas Red, you’d skip both cans, but I think the beans add such great texture for a family chili night. If you want more heat, add an extra pinch of cayenne or use hot chili powder instead of regular!
Step-by-Step Instructions for Stovetop Ground Beef Chili
Alright, time to roll up those sleeves! Since this recipe is so fast, the organization matters a ton. You want to move smoothly from one step to the next without scrambling for the cumin shaker. Remember, the aroma that starts filling your house during this process is why we call this hearty comfort food—it just smells like *home*.
My philosophy is always to take your time with the flavor builders, even in a 30-minute recipe. That means properly browning the meat and softening the vegetables. We’re building a foundation here that makes this chili truly special. If you’re interested in another classic, I have a wonderful classic hearty old-fashioned hamburger soup recipe you might love too!
Browning Meat and Sautéing Aromatics for Savory Chili Flavor
First things first: grab your biggest pot or Dutch oven and set it over medium heat. Drizzle in that ounce of olive oil. Drop in your pound of ground beef. Now, you need to work it with your spoon until it’s completely browned. Don’t rush this part! Browning the meat creates those fantastic little caramelized bits that give chili its depth. Once it’s all brown, you absolutely must drain off any excess grease. I mean, pour it right out! We want flavor, not an oil slick on top of our dinner.
Next, toss in the chopped onion and green pepper. Cook those guys down until they start getting tender—that usually takes about five minutes. See how the kitchen is starting to smell amazing already? After the veggies soften up, throw in your minced garlic. Garlic cooks so fast, so just stir it constantly for about 60 seconds until you can really smell its bright perfume. Oops! If it starts to look too dry, just add a tiny splash of broth, but usually, the fat from the beef is enough.
Simmering the Best Homemade Chili
Now comes the fun part where everything comes together. Add your rinsed and drained beans—I always rinse canned beans really well to prevent that can-y taste—along with your crushed tomatoes, tomato sauce, and that cup of beef broth. Stir everything up so those meaty bits on the bottom scrape off and get mixed in. That’s flavor gold, folks!
Next, dump in all your spices: chili powder, cumin, oregano, and the optional cayenne. Give it one good final stir to make sure the seasonings are distributed. Now, here’s where you bring it up to a gentle bubble—a simmer. As soon as you see that first bubble break the surface, reduce the heat way down to low, and cover the pot a little bit (we want some steam to escape). You need to let this simmer for a minimum of 20 minutes. My personal tip, though, as Sarah Miller always says: if you have time, let it go for a whole hour! The longer it simmers gently, the better those spices meld, making this the Best Homemade Chili you’ve ever made!
Tips for the Most Flavorful Chili
We got the basics down, but if you want to take this simple stovetop chili from ‘good’ to ‘wow, who made this?’, you have to think about layering your flavors. It’s not just about dumping everything in at the end. When I toss in the chili powder, cumin, and oregano, I make sure they bloom slightly in the heat of the simmering tomatoes just before I put the lid on. That little bit of extra cooking wakes up those dried spices!
Another big secret for texture—and this is something my mom always enforced—is to avoid stirring too much once it’s simmering. Constant stirring can break down your meat and beans too much, turning your beautiful chili into mush. Let it sit, let those flavors marry, and come back only every ten minutes or so to give it a gentle stir from the bottom up. You want a rich, thick texture, not a watery soup!
If you want to deepen that savory profile without adding hours, try browning your onions *with* a dash of Worcestershire sauce if you happen to have some tucked away. It adds a fantastic background note you can’t quite place. You can see more ways to create depth in my hearty old-fashioned vegetable beef soup recipe too, as layering is key there as well!
Serving Suggestions and Chili Toppings Ideas
I truly believe what makes a bowl of chili perfect isn’t just what’s bubbling in the pot, but what you pile on top! This thick, savory meal is just begging for some textural contrast and cool creaminess to balance out that spice. I always set up a little topping station on the counter when we have chili night. It makes it fun for the kids to customize their own bowls.
This isn’t the time to be shy with the garnish! When I set this out for my family, I make sure we have the classics available. This is where you get to be creative with your chili toppings ideas. My favorites, which I pull right from the notes on this very recipe, are simple but crucial for that ultimate comforting bite.
- A generous handful of shredded sharp cheddar cheese—it melts just perfectly.
- A dollop (or maybe two!) of cool sour cream to cut the heat.
- Freshly chopped green onions or chives for a bright little pop of allium flavor.
- A sprinkle of crushed tortilla chips for crunch!
And if you’re going to serve chili—especially one this wonderfully hearty—you absolutely must have cornbread on the side. It’s the rule! Having a square of warm, slightly sweet cornbread ready for dipping or crumbling right into the bowl elevates the whole experience. I always bake a batch of my super simple sweet potato cornbread when I know chili is on the menu. It’s the perfect sweet-and-savory partner to this robust main dish!
Make Ahead Chili and Storage Instructions
One of the absolute best things about making a big pot of homemade dinner is knowing you don’t have to cook tomorrow! This is where this recipe really shines as a true weeknight champion because, honestly, this chili tastes even better the next day. That extra 24 hours lets all those spices hang out together and deepen those complex, savory flavors. It’s magic, I tell you!
If you’re planning ahead, or if you just made a huge batch because you love leftovers (like me!), storing it properly is easy. Since this is a fantastic make ahead chili option, let’s talk about how to keep it fresh.
Refrigerating for Next Day Flavor
Once the chili has cooled down a bit—never put piping hot food directly into the fridge, just wait until it stops aggressively steaming—transfer it into airtight containers. I usually use glass containers because I can easily reheat them right on the stove! It keeps beautifully in the refrigerator for about four days. If you are planning on eating it within that window, this is my go-to method. If you’re not going to finish it all by day four, though, you should definitely look into freezing.
Freezing Your Hearty Chili
Freezing is the best way to handle big batch cooking! This specific chili freezes exceptionally well, possibly because of the beans and tomatoes which hold up nicely. I portion mine into single-serving freezer bags laid flat on a baking sheet. Once they are solid like a brick, you can stack them up vertically in your freezer to save space. I even have a few frozen bags of this waiting in the deep freeze, just like my easy strawberry freezer jam recipe!
It keeps perfectly for up to three months. When you want some, just thaw it overnight in the fridge and reheat it slowly on the stovetop. You might want to add just a splash of broth when reheating to bring back that perfect, slightly saucy consistency. It’s practically a brand new meal!
Frequently Asked Questions About This Simple Chili Recipe
I always get the best questions after I post a recipe that’s meant to be a staple, and that’s great because it shows you’re really thinking about how to make it work for *your* family! This comforting recipe is so flexible, but I know sometimes you need quick answers before you grab your apron. You’re looking for ways to adapt it, punch up the heat, or just make sure it fits your schedule.
Can I adapt this ground beef chili for a slow cooker or Crockpot Chili?
Oh yes! That’s the beauty of a great foundation recipe, isn’t it? While this version is made for the stovetop to save time, you can totally convert it into a Crockpot Chili. The only real change you need to make is browning that ground beef and chopping those veggies first—don’t skip the browning step, or your flavor will taste a little flat! Once the meat is browned and the garlic is fragrant, just toss everything—including the broth and spices—right into your slow cooker insert. Then, let it hang out on low for 6 to 8 hours, or on high for about 3 to 4 hours. It’s the definition of hands-off cooking! If you’re looking for other excellent slow-cooker recipes, check out my guide on slow cooker turkey breast for more slow-cook inspiration.
How can I make this chili spicier or turn it into a No Bean Chili?
If you think this recipe needs a real kick, you have a couple of options! For simple heat, just bump up that cayenne pepper—I’d go straight to 1/2 teaspoon, or even add a dash of dried chipotle powder for a nice smoky heat. My husband sometimes adds a splash of hot sauce right at the end, too, which works wonderfully. Now, if you’re looking to make a true No Bean Chili, the change is easy: just leave out both the kidney beans and the black beans! You might want to add an extra half cup of crushed tomatoes or broth just to keep the liquid level right, but otherwise, it works beautifully as a meat-forward version.
What makes this a great Weeknight Chili Idea?
This is purely about efficiency, which is why it lands on my list of best weeknight chili ideas! It’s fantastic because it’s an absolute one-pot chili that only requires about 10 minutes of prep work. You are browning the meat and sautéing the foundational veggies while measuring out your spices. Everything simmers together in that single pot, so cleanup is a breeze! I can get this dinner on the table faster than ordering takeout, and it tastes so much fresher and healthier, too. It’s that reliable comfort food we all need during the busy week.
Nutritional Snapshot of This Hearty Chili
I always get asked about the numbers behind the flavor, and while my kitchen isn’t a laboratory, I do like to know what we are putting into our bodies. This recipe is packed with those satisfying components that really make a meal feel complete—we’re talking good protein and fiber here, which is why it feels so filling!
Keep in mind that these estimates are based on the ingredients listed and serving 6 portions. If you add extra cheese or sour cream on top, those numbers will definitely creep up, so consider this your baseline for the main dish. For some great lighter meal ideas, always check out my collection of healthy lunch recipes!
Here is a quick look at what you can expect from one generous serving:
- Serving Size: 1.5 cups
- Calories: Approximately 410
- Protein: A solid 28 grams! That’s what gives this dish its hearty quality.
- Fat: About 18 grams total.
- Carbohydrates: Around 38 grams.
- Fiber: A wonderful 10 grams! Eating your beans definitely pays off here.
- Sodium: Roughly 650mg (this can change based on the saltiness of your broth).
See? It’s a great balance for a satisfying dinner that keeps you full well past bedtime. It’s the kind of meal that fuels you up without weighing you down.
Share Your Experience Making This Chili
Well, that’s my game plan for getting that perfect, speedy, comforting bowl of ground beef goodness on your table tonight! I really hope this Easy Stovetop Ground Beef Chili becomes the dependable staple in your house that it is in mine. Cooking should always feel like an act of love and connection, and sharing these simple, reliable recipes is how I get to connect with all of you!
I truly can’t wait to hear how it turned out for your family! Did you keep it mild, or did you manage to sneak in that extra cayenne for a real punch? Did you serve it up with my beloved sweet potato cornbread? I want all the details!
Please, if you made this recipe, do me a huge favor and leave a rating down in the comments section right below this—five stars helps other busy folks find this recipe when they need a great, quick dinner idea. And if you made any tweaks or had a favorite way to serve this chili, please share it with the HearthBite community! We all learn so much from each other’s kitchen adventures. If you have any questions as you get started or want to send photos, you can always drop me a line through my contact page!
PrintEasy Stovetop Ground Beef Chili Ready in 30 Minutes

Make this easy stovetop chili with ground beef and beans for a quick, comforting dinner. This simple one-pot meal is ready in 30 minutes and uses common spices for a satisfying flavor.
- Prep Time: 10 min
- Cook Time: 25 min
- Total Time: 35 min
- Yield: 6 servings 1x
- Category: Dinner
- Method: Stovetop
- Cuisine: American
- Diet: Vegetarian
Ingredients
- 1 tablespoon olive oil
- 1 pound ground beef
- 1 medium onion, chopped
- 1 green bell pepper, chopped
- 2 cloves garlic, minced
- 1 (15 ounce) can kidney beans, rinsed and drained
- 1 (15 ounce) can black beans, rinsed and drained
- 1 (28 ounce) can crushed tomatoes
- 1 (15 ounce) can tomato sauce
- 1 cup beef broth
- 2 tablespoons chili powder
- 1 teaspoon ground cumin
- 1/2 teaspoon dried oregano
- 1/4 teaspoon cayenne pepper (optional, for heat)
- Salt and black pepper to taste
Instructions
- Heat the olive oil in a large pot or Dutch oven over medium heat. Add the ground beef and cook until browned, breaking it apart with a spoon. Drain off any excess grease.
- Add the chopped onion and bell pepper to the pot with the beef. Cook until the vegetables soften, about 5 minutes.
- Stir in the minced garlic and cook for 1 minute until fragrant.
- Add the rinsed beans, crushed tomatoes, tomato sauce, and beef broth to the pot. Stir to combine.
- Stir in the chili powder, cumin, oregano, and cayenne pepper, if using. Season with salt and pepper.
- Bring the chili to a simmer. Reduce the heat to low, cover the pot partially, and let it cook for at least 20 minutes, stirring occasionally. For deeper flavor, simmer longer.
- Taste and adjust seasonings as needed before serving. Serve hot with your favorite chili toppings.
Notes
- For a richer flavor, you can simmer this easy chili recipe for up to an hour on low heat.
- This recipe is great for meal prep; it tastes even better the next day.
- Offer toppings like shredded cheese, sour cream, chopped green onions, or cornbread for a complete family friendly chili meal.
Nutrition
- Serving Size: 1.5 cups
- Calories: 410
- Sugar: 12
- Sodium: 650
- Fat: 18
- Saturated Fat: 7
- Unsaturated Fat: 11
- Trans Fat: 0.5
- Carbohydrates: 38
- Fiber: 10
- Protein: 28
- Cholesterol: 65