
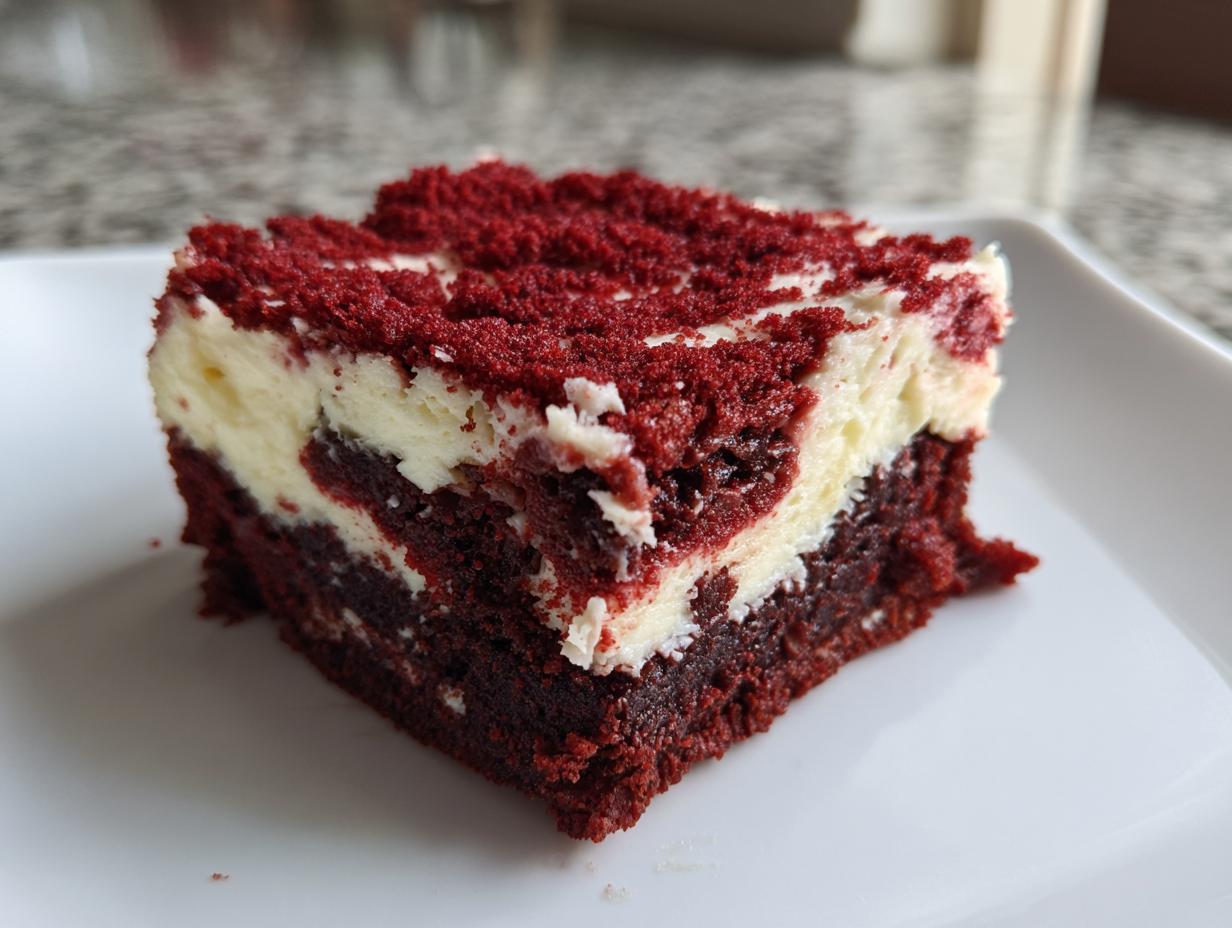
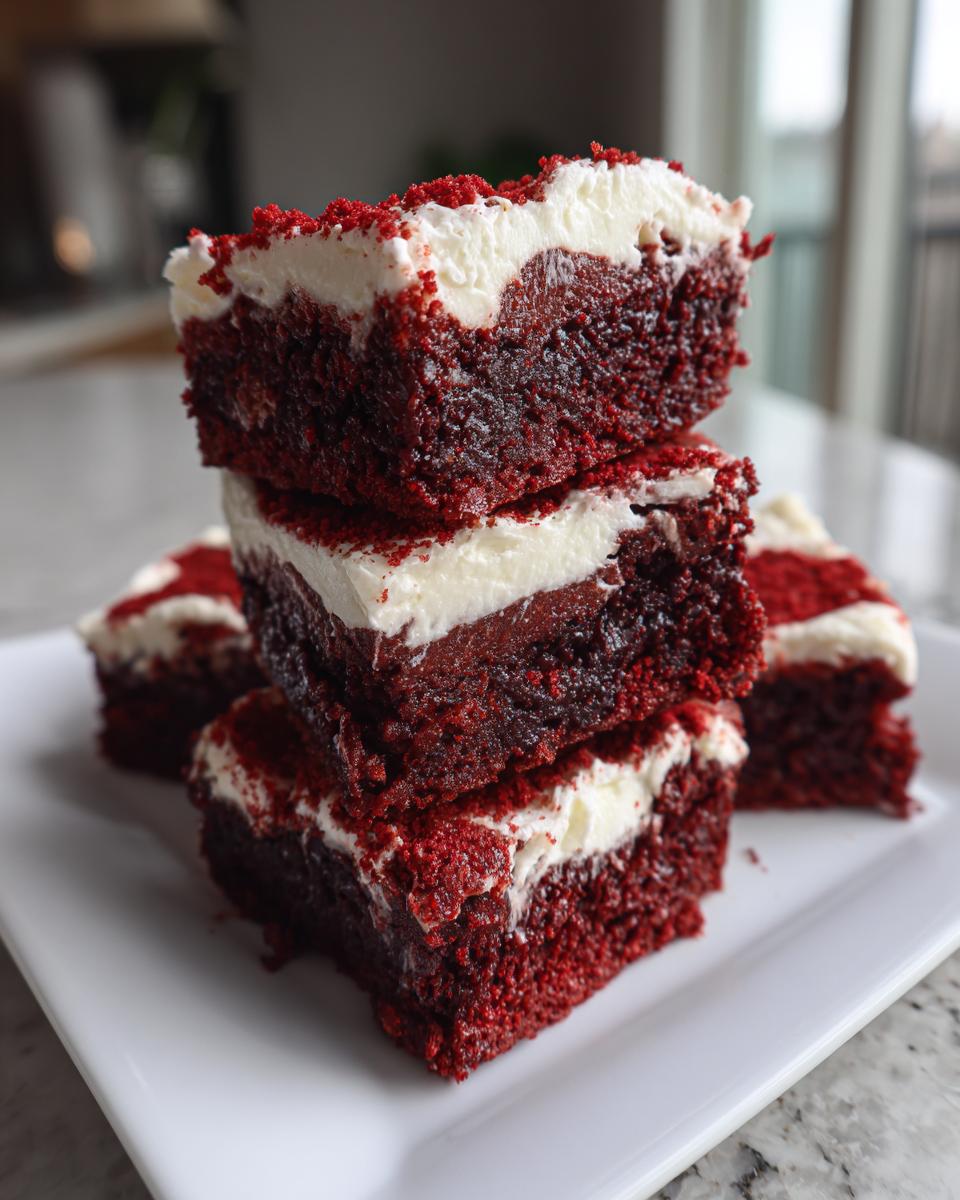
If you have ever chased that dream of a brownie that is aggressively fudgy, unbelievably rich, and still somehow holds that classic, slightly tangy red velvet flavor, then stop looking right now. This recipe for red velvet brownies topped with homemade cream cheese frosting delivers decadence in spades. Here at HearthBite, my promise—the one Sarah Miller built this kitchen on—is simple: reliable recipes that work the first time. I’ve tested every ratio in this dessert so you can skip the disappointing dry corners and jump straight to chewy, vibrant, melt-in-your-mouth perfection. These aren’t just treats; they’re easy moments of homemade joy. You are going to love how quickly these come together! If you love fudgy textures, you absolutely have to check out my recipe for fudgy crinkle cookies next.
- Why These Are the Best Fudgy Red Velvet Brownies You Will Make
- Gathering Ingredients for Your Red Velvet Brownies with Frosting
- Simple Steps to Make Delicious Red Velvet Brownies
- Tips for Perfect Homemade Red Velvet Brownies Every Time
- Variations on Classic Red Velvet Brownies
- Serving Suggestions for Your Decadent Sweet Treats
- Storage and Make-Ahead Tips for Red Velvet Brownies
- Frequently Asked Questions About Red Velvet Brownies
- Nutritional Estimates for These Red Velvet Brownies
- Share Your Experience Making These Red Velvet Brownies
Why These Are the Best Fudgy Red Velvet Brownies You Will Make
It drives me crazy when a recipe promises fudgy but delivers cakey goodness instead! Not here. These red velvet brownies are my solution for anyone who wants a truly decadent experience. They hit all the right notes.
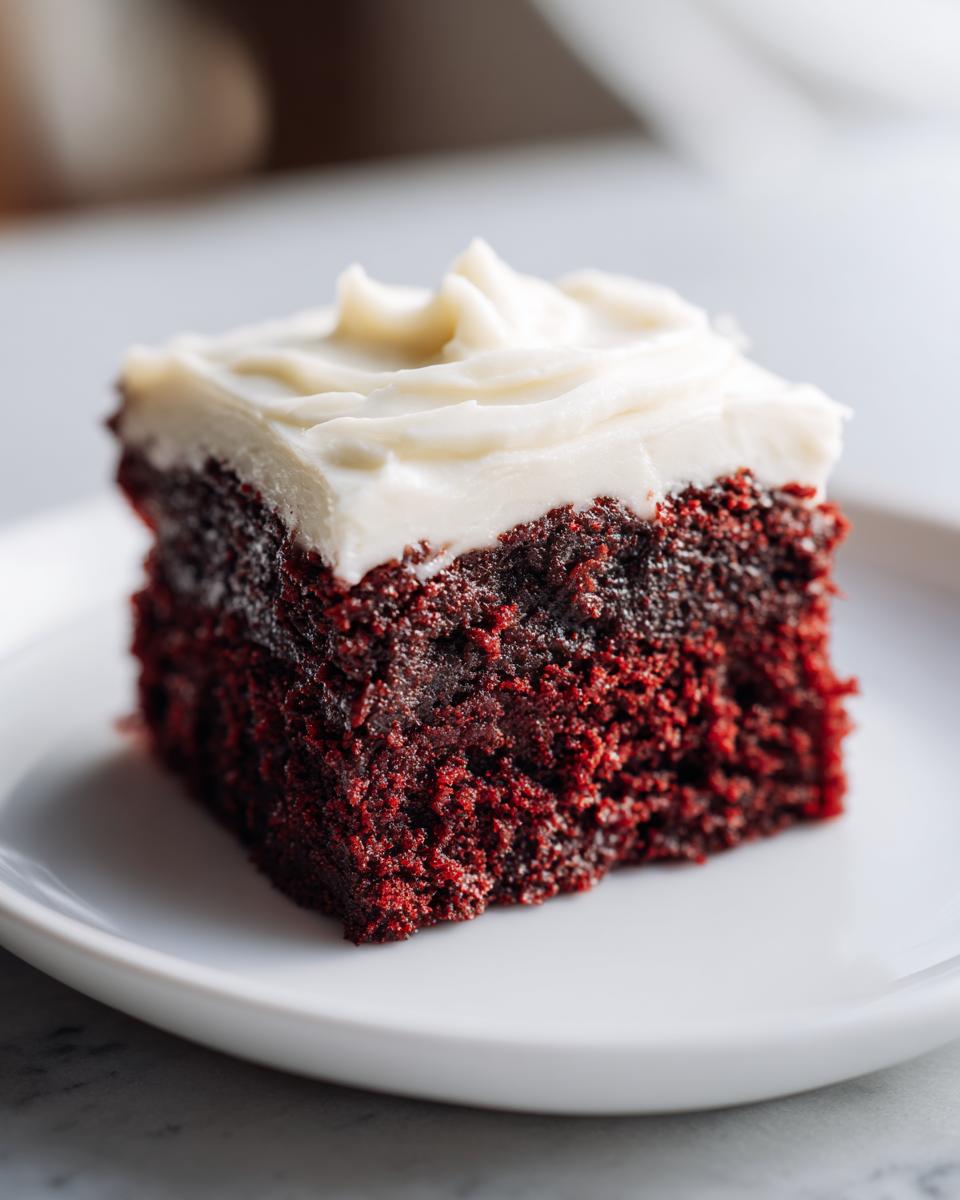
- They are intensely fudgy—borderline melt-in-your-mouth.
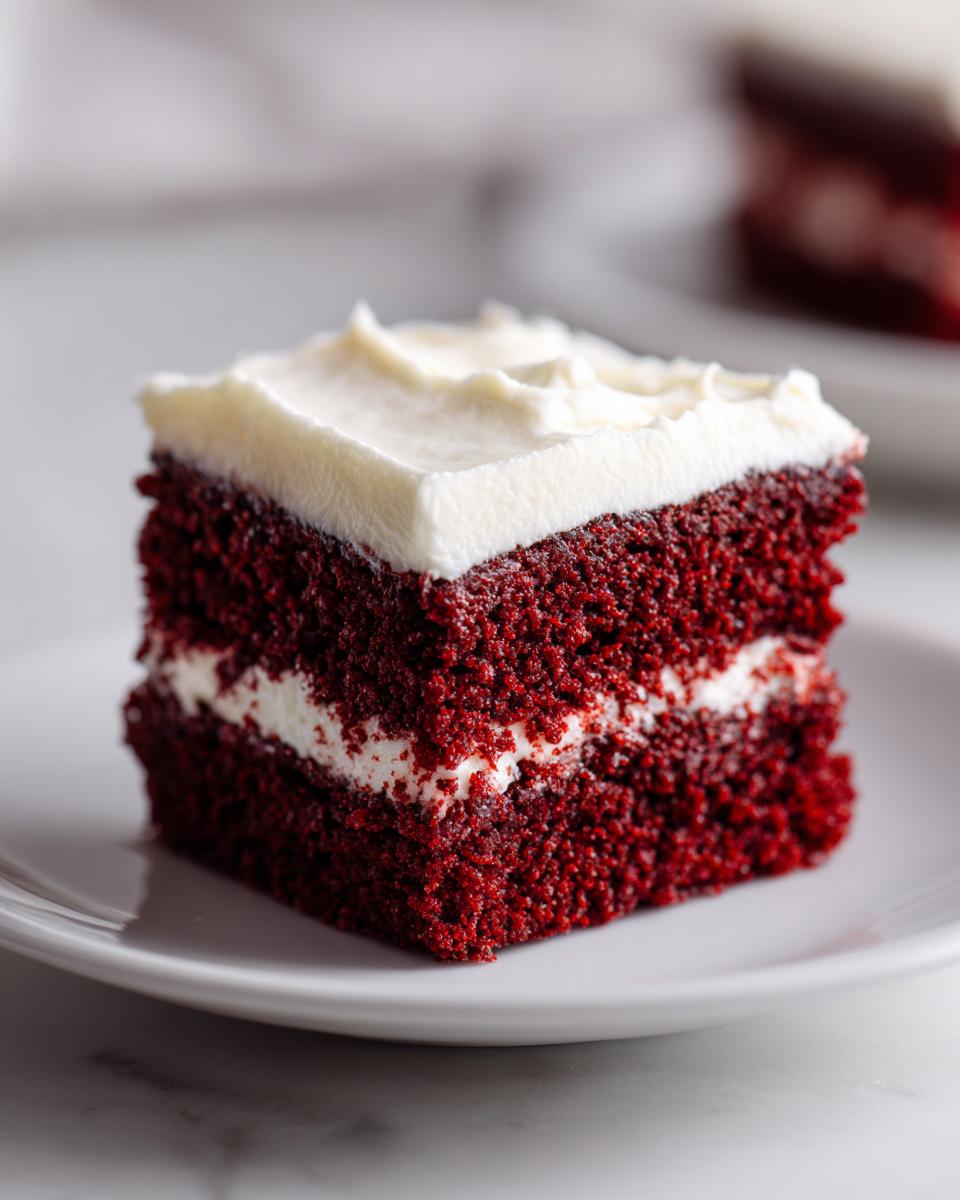
- The color is deep and vibrant, perfect for celebrations like Valentine’s Day.
- That creamy, tangy cream cheese top is non-negotiable perfection.
When you bake from this recipe, you know you are getting a foolproof treat. If you like this intense texture, then you should definitely explore my chocolate crinkle cookies sometime soon!
Achieving That Perfect Fudgy Texture in Red Velvet Brownies
The secret to that signature chew is really about cutting back on the dry stuff and prioritizing the fat. We use just enough flour to hold everything together, but we rely heavily on the melted butter and eggs to give you that dense, gooey center. We’re not trying to create lift here, we’re aiming for pure, chocolatey satisfaction. It’s all about minimizing the gluten development.
Tips for a Vibrant Red Color in Your Red Velvet Brownies
To get that stunning, eye-popping hue that makes these the ultimate vibrant red dessert, you simply have to use gel food coloring, not the watery liquid kind you might have sitting in your pantry. The liquid dye thins out your batter too much, compromising that perfect fudgy structure we worked so hard for in the brownie base. A tablespoon of the gel goes a long way in creating the signature look of classic red velvet brownies.
Gathering Ingredients for Your Red Velvet Brownies with Frosting
When baking something truly decadent, like these rich cream cheese brownies, the quality and preparation of your ingredients matter a ton. Don’t stress, though! I’ve kept the ingredient list straightforward so that making these from scratch feels totally manageable. We need two distinct sets of items: the deeply chocolatey, red base, and the bright, tangy topping. Precision here guarantees that wonderful fudgy result.
Ingredients for the Fudgy Red Velvet Brownie Base
For the brownie layer itself, make sure you have everything measured out before you start mixing. The key here is having that melted butter ready to go to combine with the sugar quickly. Remember what I said about the coloring? Gel is your best friend if you want that true signature color that pops! We’re building flavor with quality cocoa powder and balancing it out with a tiny bit of vinegar.
- 1 cup (2 sticks) unsalted butter, melted
- 2 cups granulated sugar
- 4 large eggs
- 1 tablespoon vanilla extract
- 1 teaspoon white vinegar
- 1 teaspoon red food coloring (gel preferred for vibrant color)
- 1 1/4 cups all-purpose flour
- 1/2 cup unsweetened cocoa powder
- 1/2 teaspoon salt
Ingredients for the Tangy Cream Cheese Frosting
This frosting is what truly elevates the dessert after it cools down. Think of it as the perfect counterpoint to the rich chocolate flavor underneath. For the best texture, make sure both your butter and your cream cheese have sat out long enough—we need them totally soft so they beat up beautifully without lumps. Sifting the powdered sugar is my non-negotiable step here to avoid those tiny, gritty pockets!
- 8 ounces cream cheese, softened
- 1/2 cup (1 stick) unsalted butter, softened
- 3 cups powdered sugar, sifted
- 1 teaspoon vanilla extract
If you want to level up your frosting game even further, check out my full guide on the best cream cheese frosting recipe for variations!
Simple Steps to Make Delicious Red Velvet Brownies
I know that baking can feel intimidating when you need a showstopper, but trust me, this approach for red velvet brownies is so intuitive. We are aiming for efficiency so you can get these decadent treats into the oven fast. The structure for these is designed to be simple, which helps us keep that perfect fudgy texture we crave. I’ve broken the process down into three easy chunks, managing the wet work first, then baking, and finally, the essential frosting step!
Preparing the Pan and Mixing the Red Velvet Brownies Batter
First things first: get that oven preheated to 350°F (175°C). Because we want these to lift out cleanly—no chunks allowed!—you absolutely must line your 9×13 inch pan with parchment paper, making sure you leave a nice overhang on the sides. Think of those overhangs as built-in handles for lifting later! In a big bowl, you’ll whisk your melted butter and sugar together. Then comes our eggs, one by one, mixing well after each addition. This is where you stir in your vanilla, white vinegar, and that gorgeous red food coloring until the whole bowl looks like vibrant velvet. Don’t worry about splatters; just make sure it’s uniform!
Baking and Checking for Doneness in Your Red Velvet Brownies
Now we carefully introduce the dry ingredients—the flour, cocoa powder, and salt—to the wet mixture. And this is crucial for achieving fudgy red velvet brownies: mix only until you see no more streaks of flour. Seriously, stop mixing as soon as they combine! Overmixing is the enemy of gooeyness. Spread that beautiful red batter evenly into your prepared pan. Bake for about 25 to 30 minutes. My rule for checking doneness? The toothpick test: it shouldn’t come out wet with batter, but it *must* have moist crumbs clinging to it. That’s how you guarantee moist, chewy red velvet brownies!
Creating the Cream Cheese Frosting and Finishing the Red Velvet Brownies
While those fudgy beauties are cooling down—and you must let them cool completely, otherwise the frosting will just melt into a puddle—we whip up the topping. Beat your softened cream cheese and butter until they are perfectly smooth and fluffy. Then, slowly add in all that sifted powdered sugar and vanilla. When the brownies are totally cool to the touch, you can spread that tangy topping right over the top generously. Slice them into squares, and prepare for applause! If you’re looking for more easy baking projects, you can see how I simplify things over at my easy brownie recipe guide.
Tips for Perfect Homemade Red Velvet Brownies Every Time
Achieving that bakery-style perfection with red velvet brownies really comes down to a few tiny details I picked up over the years. My biggest piece of advice, honestly, is to watch the clock like a hawk while they bake. Overbaking by even two minutes can turn your beautifully fudgy dream into something just a little too sturdy. Remember, we are looking for those moist crumbs clinging to the toothpick, not a clean pull!
Also, I can’t stress enough the importance of the food coloring. If you want that signature, deep red that makes these such stunning homemade brownies, you absolutely must use the gel kind. It gives you that intense color without adding extra liquid that messes up the fat ratio. If you’re looking to up your game when making any dessert from scratch, mastering these small swaps makes a huge difference. You can see more of my tips for scratching that baking itch over at my guide on dessert from scratch!
If you try these, you’ll see why people rave about them online, just like over at this recipe demonstrating fudgy results.
Variations on Classic Red Velvet Brownies
While I absolutely adore these red velvet brownies exactly as written—fudgy base, thick cream cheese top, perfection—sometimes I just need a little tweak, don’t you? Baking is fun, and changing things up keeps us inspired! These small adjustments don’t make the recipe complicated; they just change the final experience slightly, offering different textures or extra blasts of flavor. If you’re feeling adventurous after mastering the original, I’ve got a couple of favorite additions for you!
Making Cream Cheese Swirl Brownies
Sometimes, spreading a huge layer of frosting on top just feels like too much, even for me! Or maybe you want that tangy cream cheese flavor mingling throughout the chocolate every single bite, rather than just sitting on top. That’s where the swirl comes in. To shift from my main recipe, you’ll prepare that cream cheese topping mixture but only use half of it. Before baking, spread that half over the brownie batter. Then, take your reserved brownie batter and dollop it randomly over the cream cheese layer. Take a butter knife and gently run it through the layers a few times to create those gorgeous ribbons. It bakes right into the structure!
If you want another amazing layered treat showcasing red velvet and cream cheese, you simply must try my recipe for red velvet cheesecake layered delight; it’s spectacular.
Adding Extra Chocolate to Your Red Velvet Brownies
If you’re someone who believes you can never truly have enough chocolate—and I often consider myself one of you!—then sprinkling in some extra chocolate is the easiest modification you can make. I usually grab a bag of semi-sweet chips, but chunks of dark chocolate work wonderfully too. You just toss about a cup of your favorite chocolate chips right into the batter after you’ve finished mixing the flour and cocoa.
When they bake, you get these wonderful pockets of melted, gooey chocolate throughout the fudgy sections. It really intensifies the chocolate side of the red velvet profile, making them even more rich and decadent. Just like in my other recipes, the quality of the chocolate you choose makes a big difference in the end flavor!
Serving Suggestions for Your Decadent Sweet Treats
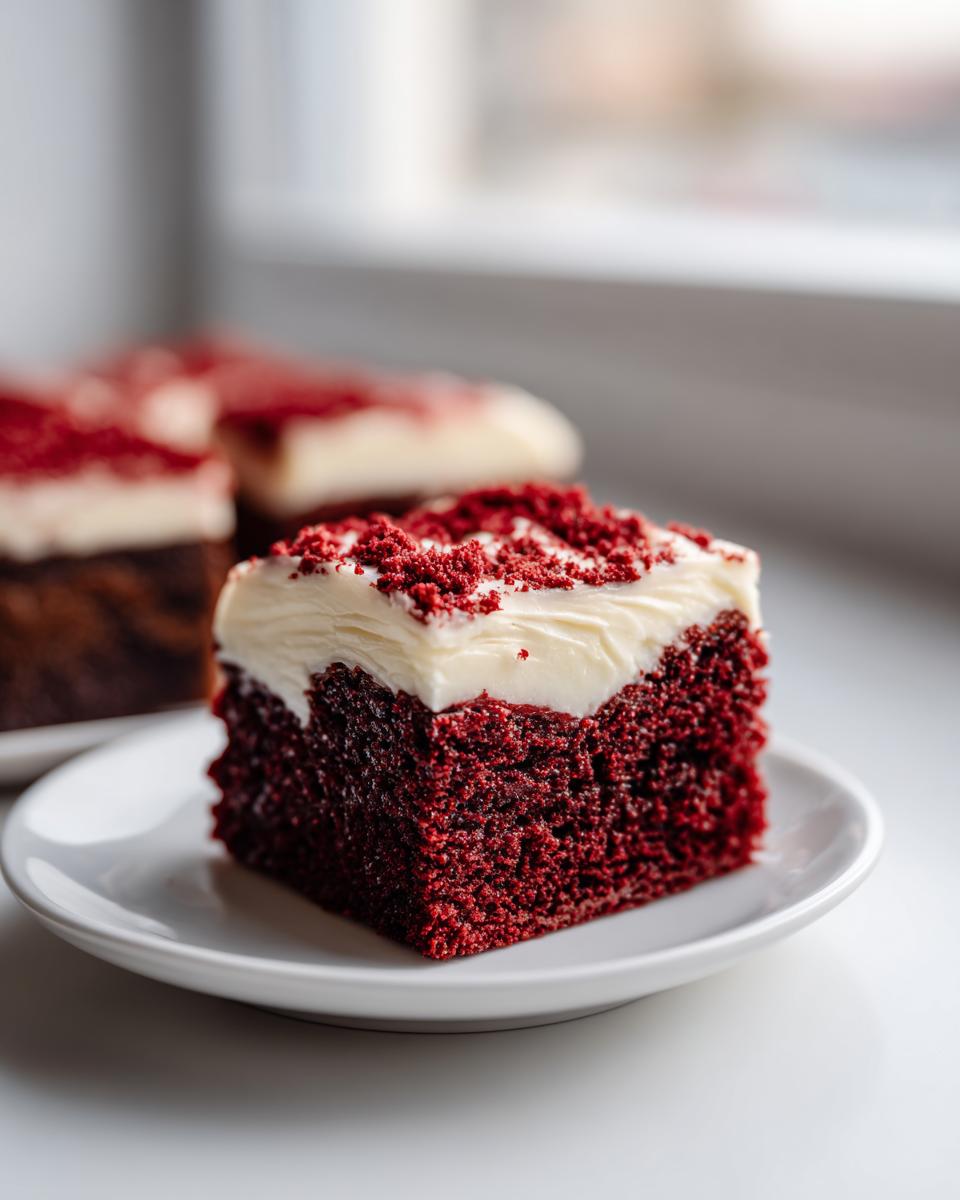
Now that you’ve pulled that perfect pan of rich, fudgy red velvet brownies out of the oven, the hard part is over! Well, almost. The real fun is deciding how to serve them up. Because these brownies already pack such a flavor punch with that chocolate base and the tang of the cream cheese frosting, they pair beautifully with almost anything cold or creamy. They are already absolute showstoppers for special occasions, which is why they’re fantastic for both big Valentine’s Day Desserts spreads or alongside those warm cookies during Christmas baking ideas.
My absolute favorite way to serve these, especially when it’s hot outside, is slightly warmed—just for about ten seconds in the microwave to get that gooey center singing again—and topping it with a big scoop of vanilla bean ice cream. The contrast between the warm, rich brownie and the cold, slightly melting ice cream is just heavenly.
If you are making these for a holiday gathering where things are already rich, try serving them with coffee instead. The slight bitterness of a really good dark roast helps cut through the sweetness of the frosting so nicely. If you are interested in more festive baking that gives you rich, comforting results, you should definitely check out my recipe for fudgy peppermint brownies for the winter season!
Storage and Make-Ahead Tips for Red Velvet Brownies
One of the best things about a truly fudgy batch of brownies, unlike a lighter cake, is that they usually keep really well. This makes them such a fantastic choice when you are planning ahead for parties or during busy holiday baking sessions—seriously, they fit right in with my philosophy of making things easier! You don’t need fancy techniques here, just common sense storage.
If you’ve already frosted them with that wonderful cream cheese topping, you’ll want to be a little more careful about temperature. For the best texture and shelf life, I recommend storing them in an airtight container at room temperature for the first couple of days. Because of the dairy in the frosting, if you plan on keeping them longer than 48 hours, definitely move them to the refrigerator. They firm up a bit in the cold, but they still taste amazing!
If you haven’t added the frosting yet, you get even more flexibility! You can keep the plain brownies sitting out, covered tightly, for up to four days. They often taste even better on day two because those fudgy flavors really get a chance to mingle. I’ve actually baked a batch on Tuesday and totally forgotten about them, only to find them perfectly delicious on Friday!
If you are in deep freeze mode with your easy brownie recipe prep, yes, you can freeze them! Once they are completely cool and cut, layer the squares between pieces of parchment paper, wrap the whole stack tightly in plastic wrap, and pop them into a freezer-safe bag. They should be good for about three months. When you want one, just pull it from the freezer and let it thaw on the counter for an hour or so. It thaws beautifully!
If you are making homemade preserves to go alongside your baking, I have a super simple recipe for easy strawberry freezer jam that requires no cooking at all, making it another stress-free addition to your kitchen prep!
Frequently Asked Questions About Red Velvet Brownies
I totally get it—when you put time into baking something as beautiful as red velvet brownies, you want all the details nailed down! I tried to make this recipe as foolproof as possible, but sometimes specific chemistry questions pop up. Here are a few things I always hear from readers when they are aiming for that perfect texture.
Can I make these red velvet brownies without cocoa powder?
Oh, that’s an interesting thought! If you skip the cocoa powder, you’ll fundamentally change the flavor profile. While red velvet technically gets its hints of sourness and color from an old reaction involving buttermilk and baking soda, the rich, deep flavor that truly identifies these as chocolate red velvet comes directly from the cocoa powder in this specific recipe. Without it, you’d just have a very sweet, tangy vanilla cake bar, not the decadent brownie experience we are aiming for here!
How do I get the shiny, crackly top on my fudgy brownies?
Ah, the legendary candy-like crackle on top! This is the mark of a truly excellent, fudgy brownies recipe, and it all comes down to the sugar dissolving completely into the wet ingredients. In Step 2, when you whisk the melted butter and sugar, you have to work at it until that mixture looks uniformly glossy before adding the eggs. The sugar forms a thin, delicate crust as it bakes and cools. If you haven’t dissolved it properly, that crust won’t form, and you end up with a duller top. Making sure your sugar is fully integrated helps you achieve that coveted shine!
Are these considered good for Valentine’s Day Desserts?
Are you kidding me? These are practically required wearing for Valentine’s Day! The incredible red color immediately makes these a showstopper for any romantic occasion or celebration. Seriously, when you put these out next to other treats, their vibrant hue just screams “special occasion.” Nothing says I love you like a rich, chocolatey, homemade dessert, and these red velvet brownies deliver that message loud and clear. You can see another beautiful holiday option over at this external link demonstrating great results.
If you have more lingering questions about achieving bakery style brownies at home, feel free to check out my tips over at my pretzel bites guide where I talk a lot about texture science!
Nutritional Estimates for These Red Velvet Brownies
Now, let’s talk numbers for a minute. I always bake purely for joy and flavor here at HearthBite, but I know some of you are curious about the details for planning or comparison purposes. Please remember that these figures are just estimates for one square serving, based on the specific ingredients called for in this recipe, including that generous layer of cream cheese frosting.
Since these are rich, decadent sweet treats, they definitely fall into the indulgence category! You are getting a good dose of fat and sugar, which is what gives you that incredible fudgy texture and satisfying decadence. If you are making these for a special event, this information should help you plan accordingly. Don’t let the numbers scare you off—sometimes your soul just needs a delicious, homemade brownie!
- Serving Size: 1 brownie square
- Calories: 350
- Sugar: 35g
- Fat: 21g (Saturated Fat: 13g)
- Carbohydrates: 38g
- Protein: 4g
As always, these are just estimates based on the ingredients listed, so variations in brands or exact measurements might shift things slightly. But this gives you a solid ballpark idea for enjoying your red velvet brownies!
Share Your Experience Making These Red Velvet Brownies
Oh, if you’ve made it this far, you’ve clearly baked a spectacular batch of red velvet brownies, and I am dying to hear all about them! This is the part of my kitchen that I cherish the most—seeing what you create. Did they come out perfectly fudgy? Was your cream cheese frosting spot-on? Did you end up eating the whole pan yourself?
Don’t be shy! Head down to the comments section below and let me know how your experience went. I truly rely on your feedback to know that this recipe is living up to its promise of being the ultimate decadent sweet treat. Rate the recipe, share your proudest photo, or even ask any lingering questions you might have. Connecting with you all is why I started HearthBite in the first place, and sharing those happy kitchen moments is pure joy.
If you need to get in touch with me directly for recipe questions or just want to share a big virtual hug, you can always reach out through my contact page. Happy baking, friends, until next time!
PrintFudgy Red Velvet Brownies with Cream Cheese Frosting
Make rich, fudgy red velvet brownies with a vibrant red color and top them with a tangy cream cheese frosting for a decadent sweet treat.
- Prep Time: 20 min
- Cook Time: 30 min
- Total Time: 50 min
- Yield: 16 servings 1x
- Category: Dessert
- Method: Baking
- Cuisine: American
- Diet: Vegetarian
Ingredients
- 1 cup (2 sticks) unsalted butter, melted
- 2 cups granulated sugar
- 4 large eggs
- 1 tablespoon vanilla extract
- 1 teaspoon white vinegar
- 1 teaspoon red food coloring (gel preferred for vibrant color)
- 1 1/4 cups all-purpose flour
- 1/2 cup unsweetened cocoa powder
- 1/2 teaspoon salt
- For the Cream Cheese Frosting:
- 8 ounces cream cheese, softened
- 1/2 cup (1 stick) unsalted butter, softened
- 3 cups powdered sugar, sifted
- 1 teaspoon vanilla extract
Instructions
- Preheat your oven to 350°F (175°C). Line a 9×13 inch baking pan with parchment paper, leaving an overhang on the sides for easy removal.
- In a large bowl, whisk together the melted butter and granulated sugar until combined.
- Add the eggs one at a time, mixing well after each addition. Stir in the vanilla extract, white vinegar, and red food coloring until the mixture is uniformly red.
- In a separate medium bowl, whisk together the flour, cocoa powder, and salt.
- Gradually add the dry ingredients to the wet ingredients, mixing only until just combined. Do not overmix to keep the brownies fudgy.
- Spread the batter evenly into the prepared baking pan. Bake for 25 to 30 minutes. A toothpick inserted near the center should come out with moist crumbs attached, not wet batter.
- While the brownies cool, prepare the frosting. Beat the softened cream cheese and butter together in a bowl until smooth.
- Gradually add the sifted powdered sugar, mixing on low speed until incorporated, then increase speed and beat until fluffy. Stir in the vanilla extract.
- Once the brownies are completely cool, spread the cream cheese frosting evenly over the top.
- Cut into squares and serve. Store leftovers covered at room temperature or refrigerated.
Notes
- For the fudgiest texture, avoid overbaking. Check for doneness early.
- Use gel food coloring for the most intense, vibrant red color without thinning the batter.
- If you prefer a cream cheese swirl instead of a full layer of frosting, reserve half the brownie batter, mix 4 oz softened cream cheese with 1/2 cup powdered sugar, swirl it over the first layer of batter before baking, then top with the remaining batter.
Nutrition
- Serving Size: 1 brownie square
- Calories: 350
- Sugar: 35
- Sodium: 150
- Fat: 21
- Saturated Fat: 13
- Unsaturated Fat: 8
- Trans Fat: 0.5
- Carbohydrates: 38
- Fiber: 1
- Protein: 4
- Cholesterol: 75