
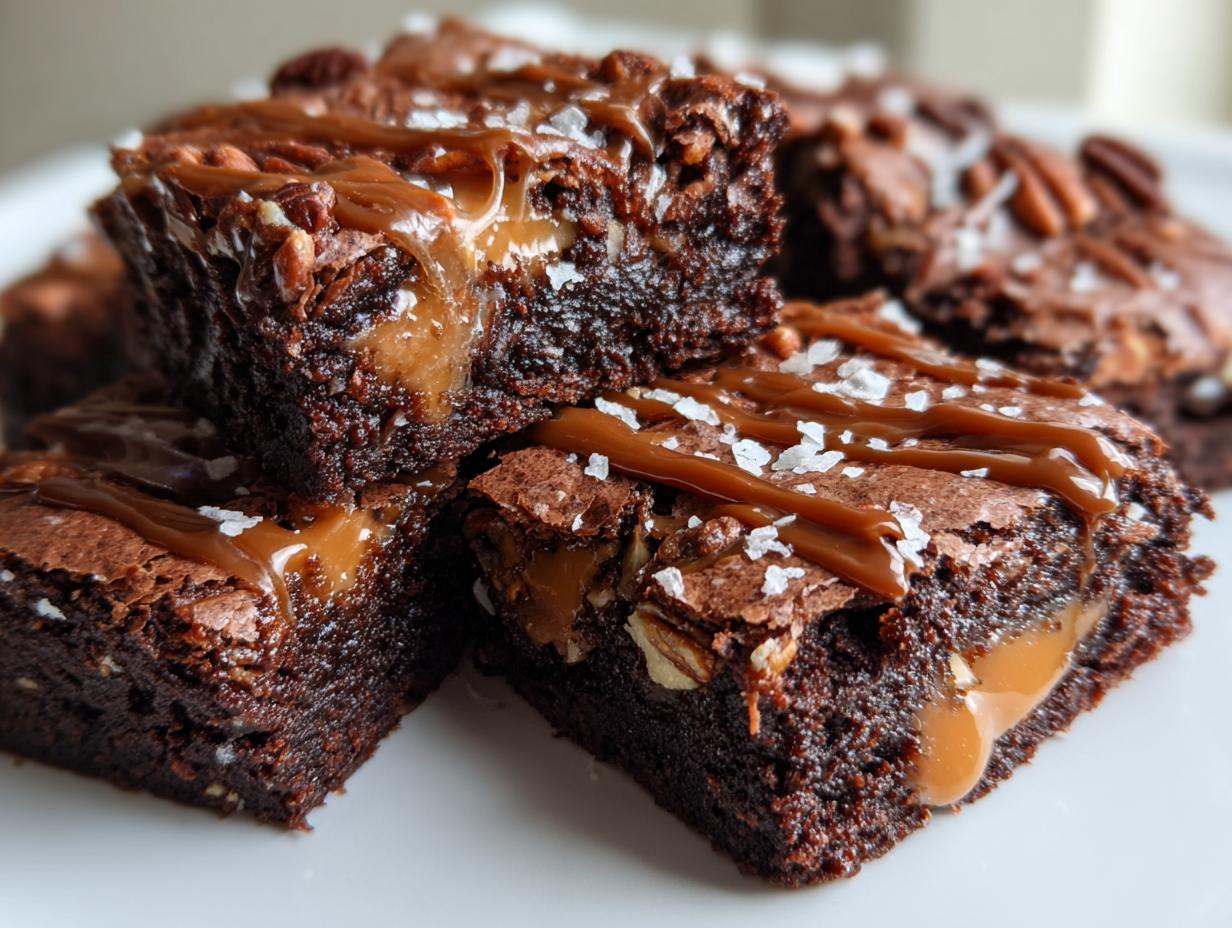
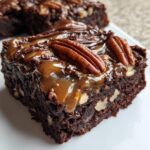
Oh, if you are looking for a dessert that just screams ‘treat yourself’—stop right here! Forget those dry, cakey things masquerading as brownies. We are making the ultimate indulgence today: rich, fudgy turtle brownies loaded with pockets of gooey caramel and that wonderful, buttery crunch from pecans. Seriously, one bite of this chocolate caramel nut bars magic and you’ll understand why I keep a batch hidden away for myself!
Baking, for me, has always been about connecting with my roots and finding that moment of peace, just like it is here at HearthBite —you can read more about why I believe in slow, intentional cooking on my About Page. These brownies are proof that simple ingredients, treated right, result in something completely extraordinary.
- Why You Will Love These Turtle Brownies Recipe
- Gathering Ingredients for Perfect Turtle Brownies
- Essential Equipment for Your Gourmet Brownie Idea
- Step-by-Step Instructions for Layering Turtle Brownies
- Finishing Touches: Drizzling Chocolate Caramel Nut Bars
- Tips for Success with Your Turtle Brownies Recipe
- Storage and Reheating Instructions for Chocolate Caramel Nut Bars
- Frequently Asked Questions About Turtle Brownies
- Understanding the Nutrition of These Turtle Brownies
- Share Your Decadent Turtle Brownies Creations
Why You Will Love These Turtle Brownies Recipe
Seriously, making these has become my go-to when I need something impressive without spending hours fussing in the kitchen. You’re getting three desserts in one: a great fudge brownie, a gooey caramel sauce, and crunchy candied nuts. Trust me, these are instant winners!
- You get that deep, fudgy texture running through the base—no cakey dryness allowed in this kitchen!
- The layering technique keeps the caramel gooey where it needs to be by baking it right into the middle.
- These look incredibly gourmet with the caramel and chocolate drizzle, but honestly, they come together fast.
- They deliver that classic candy bar flavor profile: intense chocolate married perfectly with nutty, sweet caramel goodness.
Gathering Ingredients for Perfect Turtle Brownies
Okay, before we even think about mixing, we need to talk about what we’re using. These aren’t just any brownies; they are going to be luxurious! For the fudgy base, we need that good, high-quality unsweetened cocoa powder and rich butter melt—don’t skimp here, it sets the texture. You’ll use your standard flour and sugar, of course, but the magic starts when we bring in the stars: the layers.
You absolutely need a thick caramel sauce for this. I mean thick! If it’s runny, it just sinks away entirely into the bottom layer instead of creating those delightful pockets. I usually use a store-bought brand that’s already quite dense, but if you make your own, make sure it’s cooled down until it’s stiff enough to scoop almost like frosting. We’re dividing that caramel, half for swirling and half for drizzling later, remember that! And don’t forget the pecans—they need to be roughly chopped so you get great texture throughout, not just big clumps.
Ingredient Notes and Substitutions for Caramel Pecan Brownies
Let me be super clear about the caramel sinking issue—it drives me crazy! Use the thickest caramel sauce you can find, and make sure it’s not piping hot when you drizzle it between the batters. If you can’t find pecans, please feel free to use walnuts; they have a similar buttery mouthfeel that works perfectly with the chocolate. Some people sneak in mix-ins like toffee bits, but I stick to the classic combo for these caramel pecan brownies.
For the chocolate in the base, I rely on semi-sweet chips because they melt just right, but if you want something richer, swap those out for dark chocolate chips instead. The milk chocolate chips are strictly reserved for that final, beautiful drizzle on top!
Essential Equipment for Your Gourmet Brownie Idea
You don’t need a ton of fancy gadgets for these, which is part of why I love them so much! But having the right tools makes the process so much smoother, especially when dealing with sticky caramel. Seriously, don’t even try skipping the parchment paper.
First up, you absolutely need a good sturdy 9×13 inch baking pan. That size gives us enough surface area for that perfect balance of thin, fudgy layers. If you use something too small, they turn into cake!
You’ll want a large mixing bowl for getting the wet ingredients nice and creamy. A second, slightly smaller bowl is handy for whisking all those dry things—the cocoa powder and flour—together so they incorporate smoothly into the wet mix. Trust me, whisking the dry stuff first makes the finished batter much smoother.
The MVP for this entire recipe, though, is the parchment paper. I cut mine generously so I have an overhang on two sides. This creates little ‘slings’ so when these are completely cooled down—and they MUST be cool, I’ll explain why later—you can grab the paper handles and lift the entire slab right out of the pan for easy cutting. It saves your slices from breaking apart, making them look truly professional.
Step-by-Step Instructions for Layering Turtle Brownies
Time to get messy! We follow a very specific order here—think of it like building a decadent, edible sandwich. First things first: get that oven preheated to 350°F (175°C) and make sure your 9×13 pan is lined with that lovely parchment sling we talked about. A quick spray of oil on the paper ensures nothing sticks!
Next, we tackle the chocolate base. Melt your butter, whisk in the sugar until they look best friends, and then beat in those eggs one by one until everything is glossy. Now, here’s where you need to be gentle. Mix your cocoa, flour, and salt in a separate bowl. Add this dry mixture to the wet ingredients slowly. We are mixing only until we see no more white streaks! If you beat it too much, BAM! You’ve developed gluten, and we’ll end up with cake instead of our desired fudgy goodness.
Fold in those semi-sweet chips, pour half of that batter into your prepared pan, and spread it out nice and even. This sets the stage for the middle layer of pure bliss. This is where the turtle brownies really earn their name.
Achieving the Perfect Fudgy Base for Turtle Brownies
The key to that intensely fudgy texture is twofold: plenty of fat (the melted butter we started with) and absolutely no overmixing once the flour hits the bowl. When you combine the dry and wet ingredients, think folding, not whipping. You just want them barely acquainted enough to come together. Stop mixing the second you stop seeing streaks of dry flour. A few lumps of batter are totally fine; they’ll smooth out once we add the toppings and the second layer of batter on top.
Techniques for Swirling Caramel and Pecans in Turtle Brownies
Spoon half of your thick caramel sauce right over that first layer of batter. Don’t try to spread it perfectly; just dollop it around and let it settle. Then, take half of your chopped pecans and sprinkle them evenly over that caramel layer. Hear that satisfying, nutty sound? That’s the sound of success!
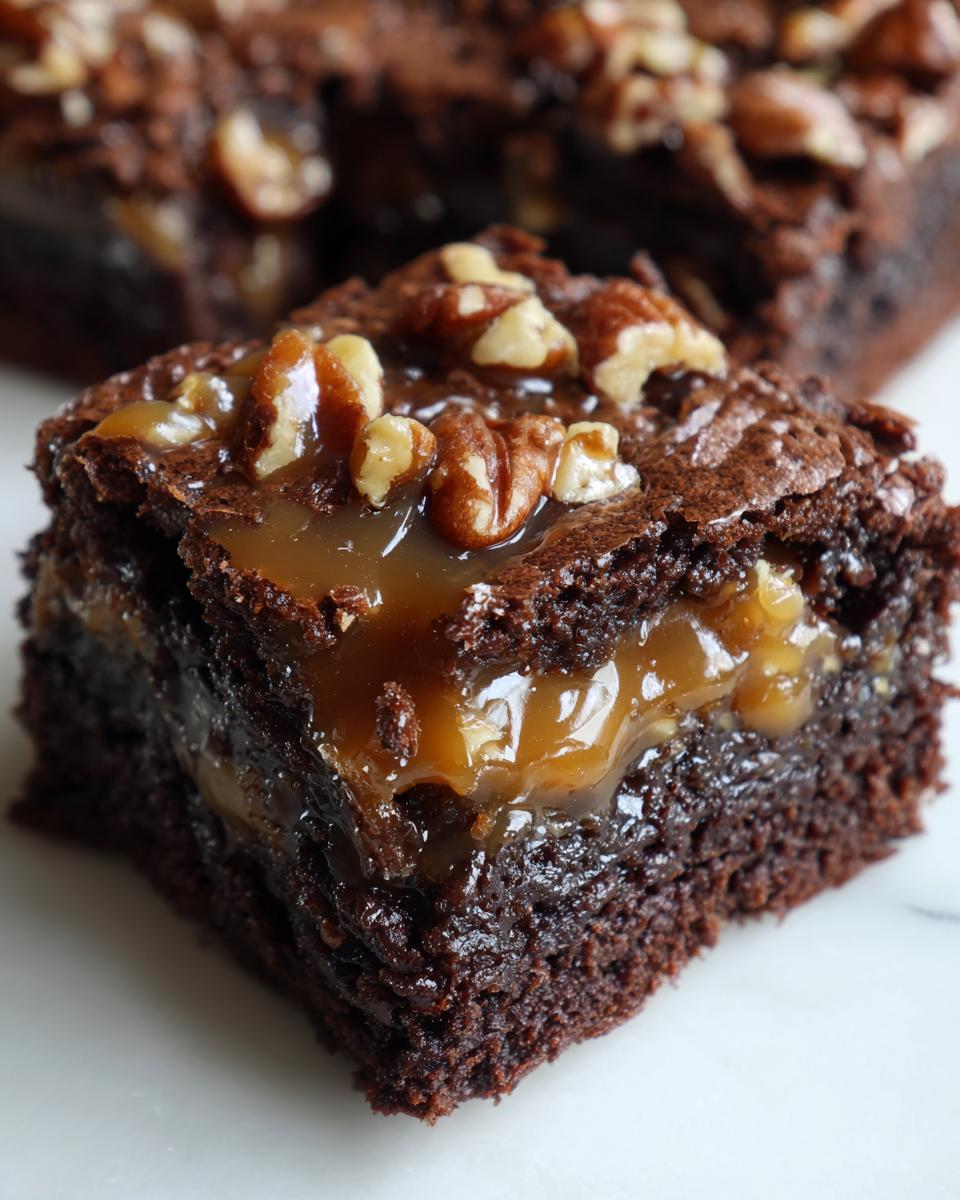
Now, very gently, spoon the rest of your brownie batter right over the top. Try not to dig down into the caramel layer too much; we want to trap most of it in the middle. If you notice the pecans trying to dive straight to the bottom, give them a very light press—just enough to keep them somewhat suspended in the top batter layer. Bake this masterpiece for 25 to 30 minutes. You’re looking for the edges to be set, but the center should wobble just a tiny bit when you nudge the pan. That wobble means they are perfectly fudgy inside!
Finishing Touches: Drizzling Chocolate Caramel Nut Bars
The brownies are out of the oven, and they smell absolutely heavenly, right? This is the part where we elevate them from delicious bars to the truly gourmet brownie idea they are meant to be. Speed is important here because we want that leftover heat to make our final drizzle layers meld beautifully into the top but not melt the entire thing into soup!
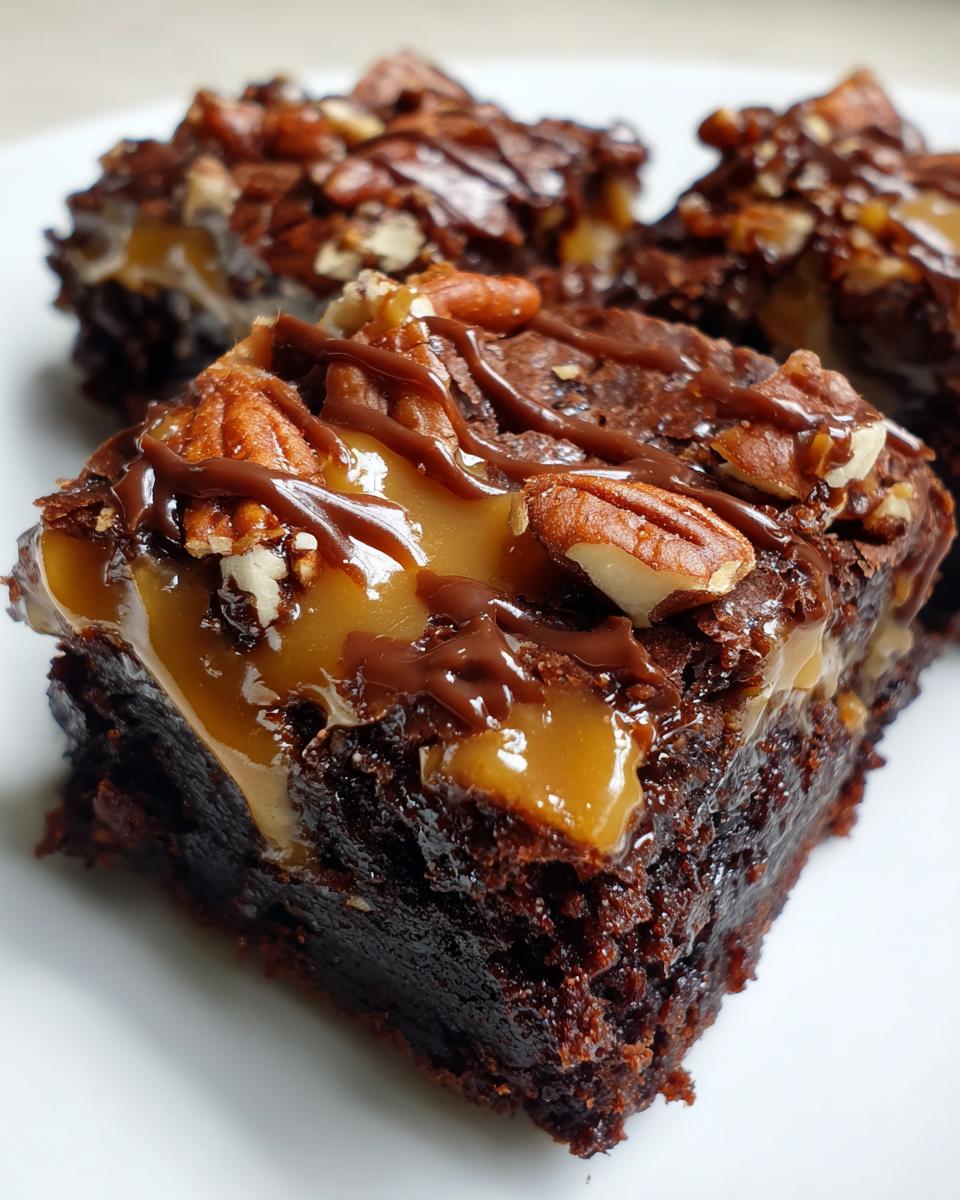
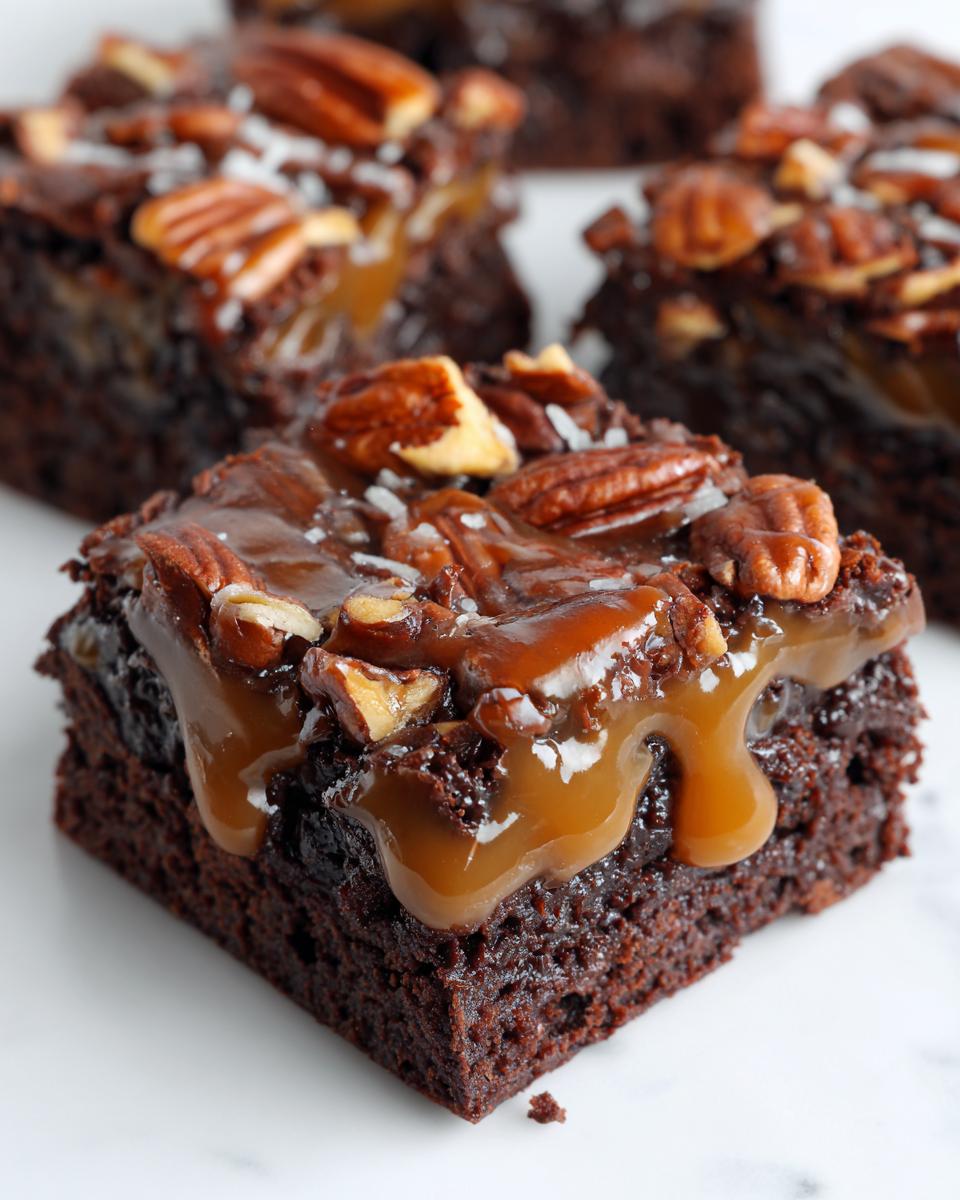
As soon as they come out—and I mean *immediately*—grab that reserved half cup of thick caramel sauce. Drizzle it artfully all over the hot surface. Don’t worry about uniformity; the messier the drizzle, the better the final look! Next, sprinkle on the rest of those gorgeous chopped pecans. They’ll stick right into that hot, soft caramel layer.

Now, we melt that last half cup of milk chocolate chips. I usually pop mine in a small, microwave-safe bowl for 30-second intervals, stirring in between until they’re perfectly smooth and pourable. Take a fork or a small spoon and drizzle that rich, melted chocolate over the caramel and nuts. Wow! Those three layers—dark fudge, gold caramel, and shiny chocolate—look so decadent together.
Here is the biggest tip, and please listen to me on this: You *must* let these cool completely. I know it’s torture, especially when they smell this good, but if you try to cut them when they are warm, all that beautiful gooey caramel will ooze everywhere, and you’ll end up with messy blobs instead of neat chocolate caramel nut bars. I usually let mine sit on the cooling rack for at least three hours. Once they are fully cooled and set up, grab that parchment paper sling—see? Told you it would be useful!—and lift them out. Then you can slice them into perfectly beautiful squares. Patience pays off big time here!
Tips for Success with Your Turtle Brownies Recipe
We’ve made the ultimate indulgent treat, but success in these layered bars comes down to a couple of tiny details. I’ve learned these tricks over many, many batches when sometimes the caramel just wouldn’t behave! Follow these three easy steps, and you’ll get those perfect fudgy centers with gooey, slightly chewy toppings every single time.
First, let’s talk about that caramel sauce temperature again. This is HUGE for keeping your layers where they belong. When you dollop the caramel over the first layer of batter, it needs to be quite thick. If you are using a store-bought sauce, sometimes they are too thin straight from the jar. If that’s the case, I sometimes microwave it for just 10 seconds, stir really well, and let it sit for five minutes before drizzling. We want it warm enough to spread slightly, but definitely not hot. Hot caramel will thin out and disappear when the second layer of batter goes on top—we want that gooey pocket!
My second absolute rule, which I briefly mentioned, is the cooling time. Seriously, don’t even try to cut these early! If you rush this part of your turtle brownies recipe, the hot caramel and melted chocolate are going to turn into a sticky mess all over your knife, and your squares will look ragged. You need them to totally cool down on the counter—I usually say three hours minimum, or even better, make them the day before and cut them the next morning. They firm up beautifully overnight, and the texture becomes even better!
Finally, for presentation that looks truly gourmet, try warming your cutting knife slightly before you slice. Just run it under very hot water and wipe it completely dry before making a cut. Dip and wipe between every slice, especially if the brownies have started to warm up a bit while sitting out. That little bit of warmth helps slice cleanly through the hardened chocolate drizzle and the firm caramel pocket, giving you those gorgeous, clean edges for your caramel pecan brownies.
Storage and Reheating Instructions for Chocolate Caramel Nut Bars
These rich bars are the definition of indulgence, and we clearly want them to stay perfect for as long as possible! Luckily, because of all that fat and sugar, they keep really well, which is handy since I rarely have leftovers for long.
For storage, the main goal is keeping air out so that fudgy brownie base doesn’t dry up on us. Once you have successfully cut these beauties into squares—which, remember, needs time to set!—you want to move them into an airtight container. I usually line the container with a piece of parchment paper first, just to separate the layers if they’re stacked, though personally, I prefer to keep them in a single layer if I can spare the counter space.
Room temperature is usually my favorite spot for these, especially during cooler months here in Ohio. They stay nice and soft enough for grabbing. Keep the container somewhere cool and definitely away from direct sunlight or heat sources. They generally last great for about three to four days this way. If your kitchen runs particularly hot, or if you’re worried about humidity messing with the caramel, you can absolutely store them in the fridge. Just know that cooling them down too much will stiffen up that lovely caramel pocket!
Speaking of stiffening up, let’s talk about reheating, because nobody wants a cold, hard slab of chocolate caramel when they take that first bite. If you refrigerated yours, pull them out about 30 minutes before you plan to eat them to let them soften up naturally.
If you want that “fresh-from-the-oven” gooey effect, here is my secret little trick. Take just one or two chocolate caramel nut bars—don’t try to heat the whole pan, obviously!—and pop them on a small microwave-safe plate. Heat them for about 10 to 15 seconds on medium power. You only want to warm them just until the caramel starts to get soft and gooey again. Be careful not to go too long; we aren’t trying to melt the chocolate coating completely, just warm the inside slightly. That tiny blast of warmth makes these bars taste absolutely brand new again!
Frequently Asked Questions About Turtle Brownies
It’s always natural to have questions when you’re leveling up from a plain brownie to something as glorious as these triple-threat turtle brownies. I’ve answered the questions I get most often from friends who are trying this recipe for the first time!
Why did my caramel sink to the bottom of my turtle brownies?
Oh, the sinking caramel blues! This is the number one frustration people have with layered bars, and I totally get why it makes you cross! Usually, this happens for two reasons. First, your caramel sauce was probably too thin or too warm when you were layering. If it’s watery, it just runs right through the batter and settles against the bottom of the pan. Second, if you used a runny batter or stirred the caramel layer in too much instead of letting it sit on top of the first layer, it will try to escape downwards.
For next time, make absolutely sure your caramel is thick—almost scoopable! Also, when you pour that second half of the brownie batter over the caramel and nuts, spread it gently with the back of a spoon, don’t use a spatula to ‘mix’ it in. We want to trap that gooey goodness in the middle for perfect caramel pecan brownies!
Can I make these turtle brownies ahead of time?
You certainly can, and honestly, I highly recommend it! These fudgy brownies are actually better on day two. Why? Because when they cool completely, the caramel firms up around the nuts and the chocolate sets, which makes slicing them into those perfect, clean squares so much easier. Think about it: if you cut them warm, you get sticky edges everywhere!
I usually bake them fully, let them cool completely on the counter for about four hours, and then I’ll cover the whole pan tightly with plastic wrap or foil. They’re perfect stored this way at cool room temperature for up to three days. If you need them softer for serving, just leave them on the counter for about 30 minutes before slicing. It’s the ultimate plan-ahead treat!
Are pecans the only nut I can use in these chocolate caramel nut bars?
Not at all! While pecans are traditional for that classic turtle candy flavor, feel free to swap them out if you prefer, or if someone has an allergy. Walnuts are a fantastic substitute; they have a similar rich, buttery flavor that complements the caramel beautifully. You could even toast them lightly before chopping to bring out a little extra depth in their flavor profile. Just make sure whatever nut you choose is chopped fairly finely so you get nice distribution throughout the whole bar, which really enhances the overall texture of your chocolate caramel nut bars.
How can I ensure the brownies are fudgy and not cakey?
This comes straight back to the mixing method we talked about in the steps! The main reason brownies turn cakey is overmixing the dry ingredients. Once that flour meets the wet ingredients, all you need to do is mix until the last streaks of white flour disappear. Stop, I mean *stop*, right there! Too much mixing develops gluten, and that makes things rise like cake instead of staying dense and fudgy like a good brownie should be. Use melted butter instead of softened butter too; that always encourages a denser texture over cakey lightness in your fudgy brownies.
Understanding the Nutrition of These Turtle Brownies
I always feel a tiny bit sheepish including nutrition facts because, let’s be honest, when you are making decadent caramel pecan brownies like these, you aren’t exactly counting calories! But I know some of you are curious, so I want to be upfront about what we’re dealing with here regarding the numbers.
Please keep this in mind: the data you see listed in the full recipe card is based on standard calculations using the specific types of sugar, butter, and chocolate I generally prefer. Every brand of cocoa powder or caramel sauce has slightly different sugar and fat content, and remember we are dividing this into 24 squares!
Because of these variables—and because I want you to bake these with joy and not worry—think of this information as merely a reference point. If you want the precise breakdown for your specific batch, you’d need to input your exact ingredients into a reliable online calculator. For me, I focus on the fact that sharing these rich chocolate caramel nut bars brings joy to my family, and that’s the most important measurement!
If you are curious about how we handle your personal information as you browse recipes and check out this nutritional estimates section, you can always read through our formal details on the Privacy Policy page. Happy baking, my friends!
Share Your Decadent Turtle Brownies Creations
Now that you’ve gone through the effort of making these show-stopping, gooey chocolate caramel nut bars, I absolutely have to see them! Seriously, there is nothing that makes my day faster than knowing someone else is enjoying a perfectly fudgy square fresh from my kitchen.
When you pull those beauties out of the oven, take a quick photo before they disappear! I love seeing how everyone styles that final chocolate drizzle. Did you go wild with the pecans? Did you manage to get those perfect, clean slices? Tag me on social media or send a picture my way!
And please, if you loved these brownies—and I know you will—leave a rating right here on the recipe card! Five stars means the world to me because it helps other home cooks find these reliable, comforting recipes. Your feedback is what lets me know I’m doing a good job keeping that spirit of warmth alive here at HearthBite.
If you ran into any little snags, or if you have a genius modification you want to share with the community regarding your turtle brownies, hop over to my contact page here. I love hearing from you all and learning from your experiences, too! We’re all learning together in this kitchen.
Thank you so much for baking with me today. I hope these decadent treats bring a whole lot of comfort and sweetness to your table!
PrintDecadent Turtle Brownies with Caramel and Pecans
Make rich, fudgy brownies layered with gooey caramel sauce and crunchy pecans for a gourmet chocolate caramel nut bar experience.
- Prep Time: 20 min
- Cook Time: 30 min
- Total Time: 50 min
- Yield: 24 servings 1x
- Category: Dessert
- Method: Baking
- Cuisine: American
- Diet: Vegetarian
Ingredients
- 1 cup (2 sticks) unsalted butter, melted
- 2 cups granulated sugar
- 4 large eggs
- 1 teaspoon vanilla extract
- 3/4 cup unsweetened cocoa powder
- 1 cup all-purpose flour
- 1/2 teaspoon salt
- 1/2 cup semi-sweet chocolate chips
- 1 cup thick caramel sauce, divided
- 1 cup chopped pecans, divided
- 1/2 cup milk chocolate chips (for drizzling)
Instructions
- Preheat your oven to 350°F (175°C). Line a 9×13 inch baking pan with parchment paper, leaving an overhang for easy removal. Lightly grease the paper.
- In a large bowl, whisk together the melted butter and granulated sugar until smooth.
- Beat in the eggs one at a time, mixing well after each addition. Stir in the vanilla extract.
- In a separate bowl, whisk together the cocoa powder, flour, and salt. Gradually add the dry ingredients to the wet ingredients, mixing until just combined. Do not overmix.
- Fold in the 1/2 cup of semi-sweet chocolate chips.
- Spread half of the brownie batter into the prepared pan.
- Drizzle 1/2 cup of the caramel sauce evenly over the batter. Sprinkle with 1/2 cup of the chopped pecans.
- Gently spread the remaining brownie batter over the caramel and pecan layer.
- Bake for 25 to 30 minutes. The edges should look set, but the center should still be slightly soft for fudginess.
- Remove the brownies from the oven. Immediately drizzle the remaining 1/2 cup of caramel sauce over the top. Sprinkle with the remaining 1/2 cup of pecans.
- Melt the milk chocolate chips. Drizzle the melted chocolate over the caramel and pecans.
- Let the brownies cool completely in the pan on a wire rack before lifting them out using the parchment overhang. Cut into squares.
Notes
- For the best caramel swirl effect, use a thick, store-bought caramel sauce or a homemade sauce that has cooled slightly before drizzling.
- To prevent the pecans from sinking completely, press them lightly into the top layer of batter before baking.
- Cooling the brownies completely before cutting helps achieve clean slices for your gourmet brownie idea.
Nutrition
- Serving Size: 1 square
- Calories: 280
- Sugar: 30
- Sodium: 110
- Fat: 16
- Saturated Fat: 8
- Unsaturated Fat: 8
- Trans Fat: 0
- Carbohydrates: 33
- Fiber: 2
- Protein: 4
- Cholesterol: 65